Twilio SMS Messaging Integration
Twilio is a third-party integration for ministries that wish to have a dedicated phone number for sending SMS messages. Twilio works for sending voice messages from ChurchTrac as well.
This integration is the most cost-effective way to have mass texting for your ministry.
Total Setup Time: 20-40 minutes
**Ministries located outside of the United States will need to use Twilio SMS to send text messages or voice messages to their people.
- Step 1: Create a Twilio Account
- Step 2: Get a Phone Number
- Step 3: Upgrade and Fund Your Twilio Account
- Step 4: Link ChurchTrac to Twilio
- Step 5: Verify Your Toll Free Number
- Step 6: Send a Test Message
- Before You Text Your Church
- Sending Text Messages
- Setting Up Auto Replies
- Automations Using SMS
- Twilio Troubleshooting
Step 1: Create a Twilio Account (2-5 minutes)
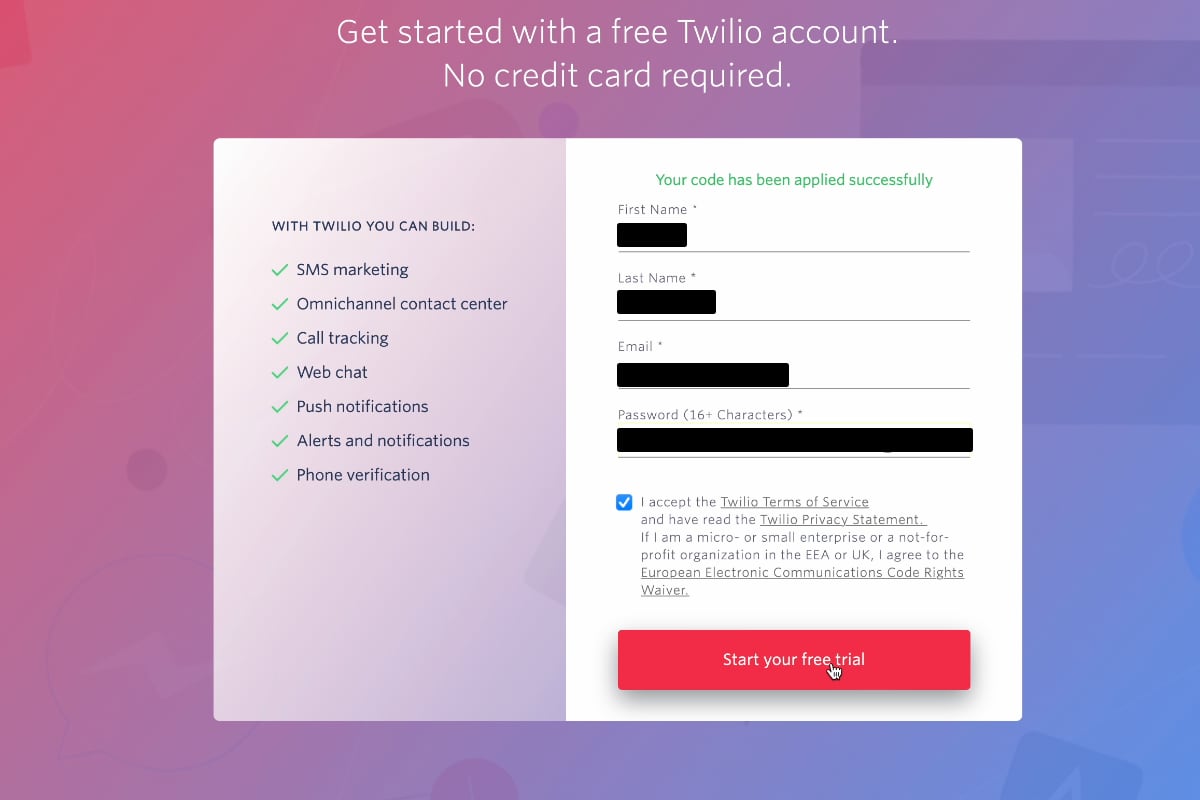
To send messages through Twilio, you will need to create a Twilio account. If you do not have a Twilio account, use this link to get started.
Click here to Create a Twilio Account
Proceed by providing Twilio with basic information for your ministry. You will need to verify your email address as well as a phone number to officially create your account.
Once you've verified your contact information, Twilio will ask a series of setup questions to customize your experience.
- What do you plan to build with Twilio? Alerts & Notifications
- Which Twilio product are you here to use? SMS
- Which best describes you/your organization? Nonprofit or government entity

- Which best describes how you will use Twilio? Direct Brand
- How do you want to build with Twilio? With no code at all
- What is your goal today? 3rd party inegrations

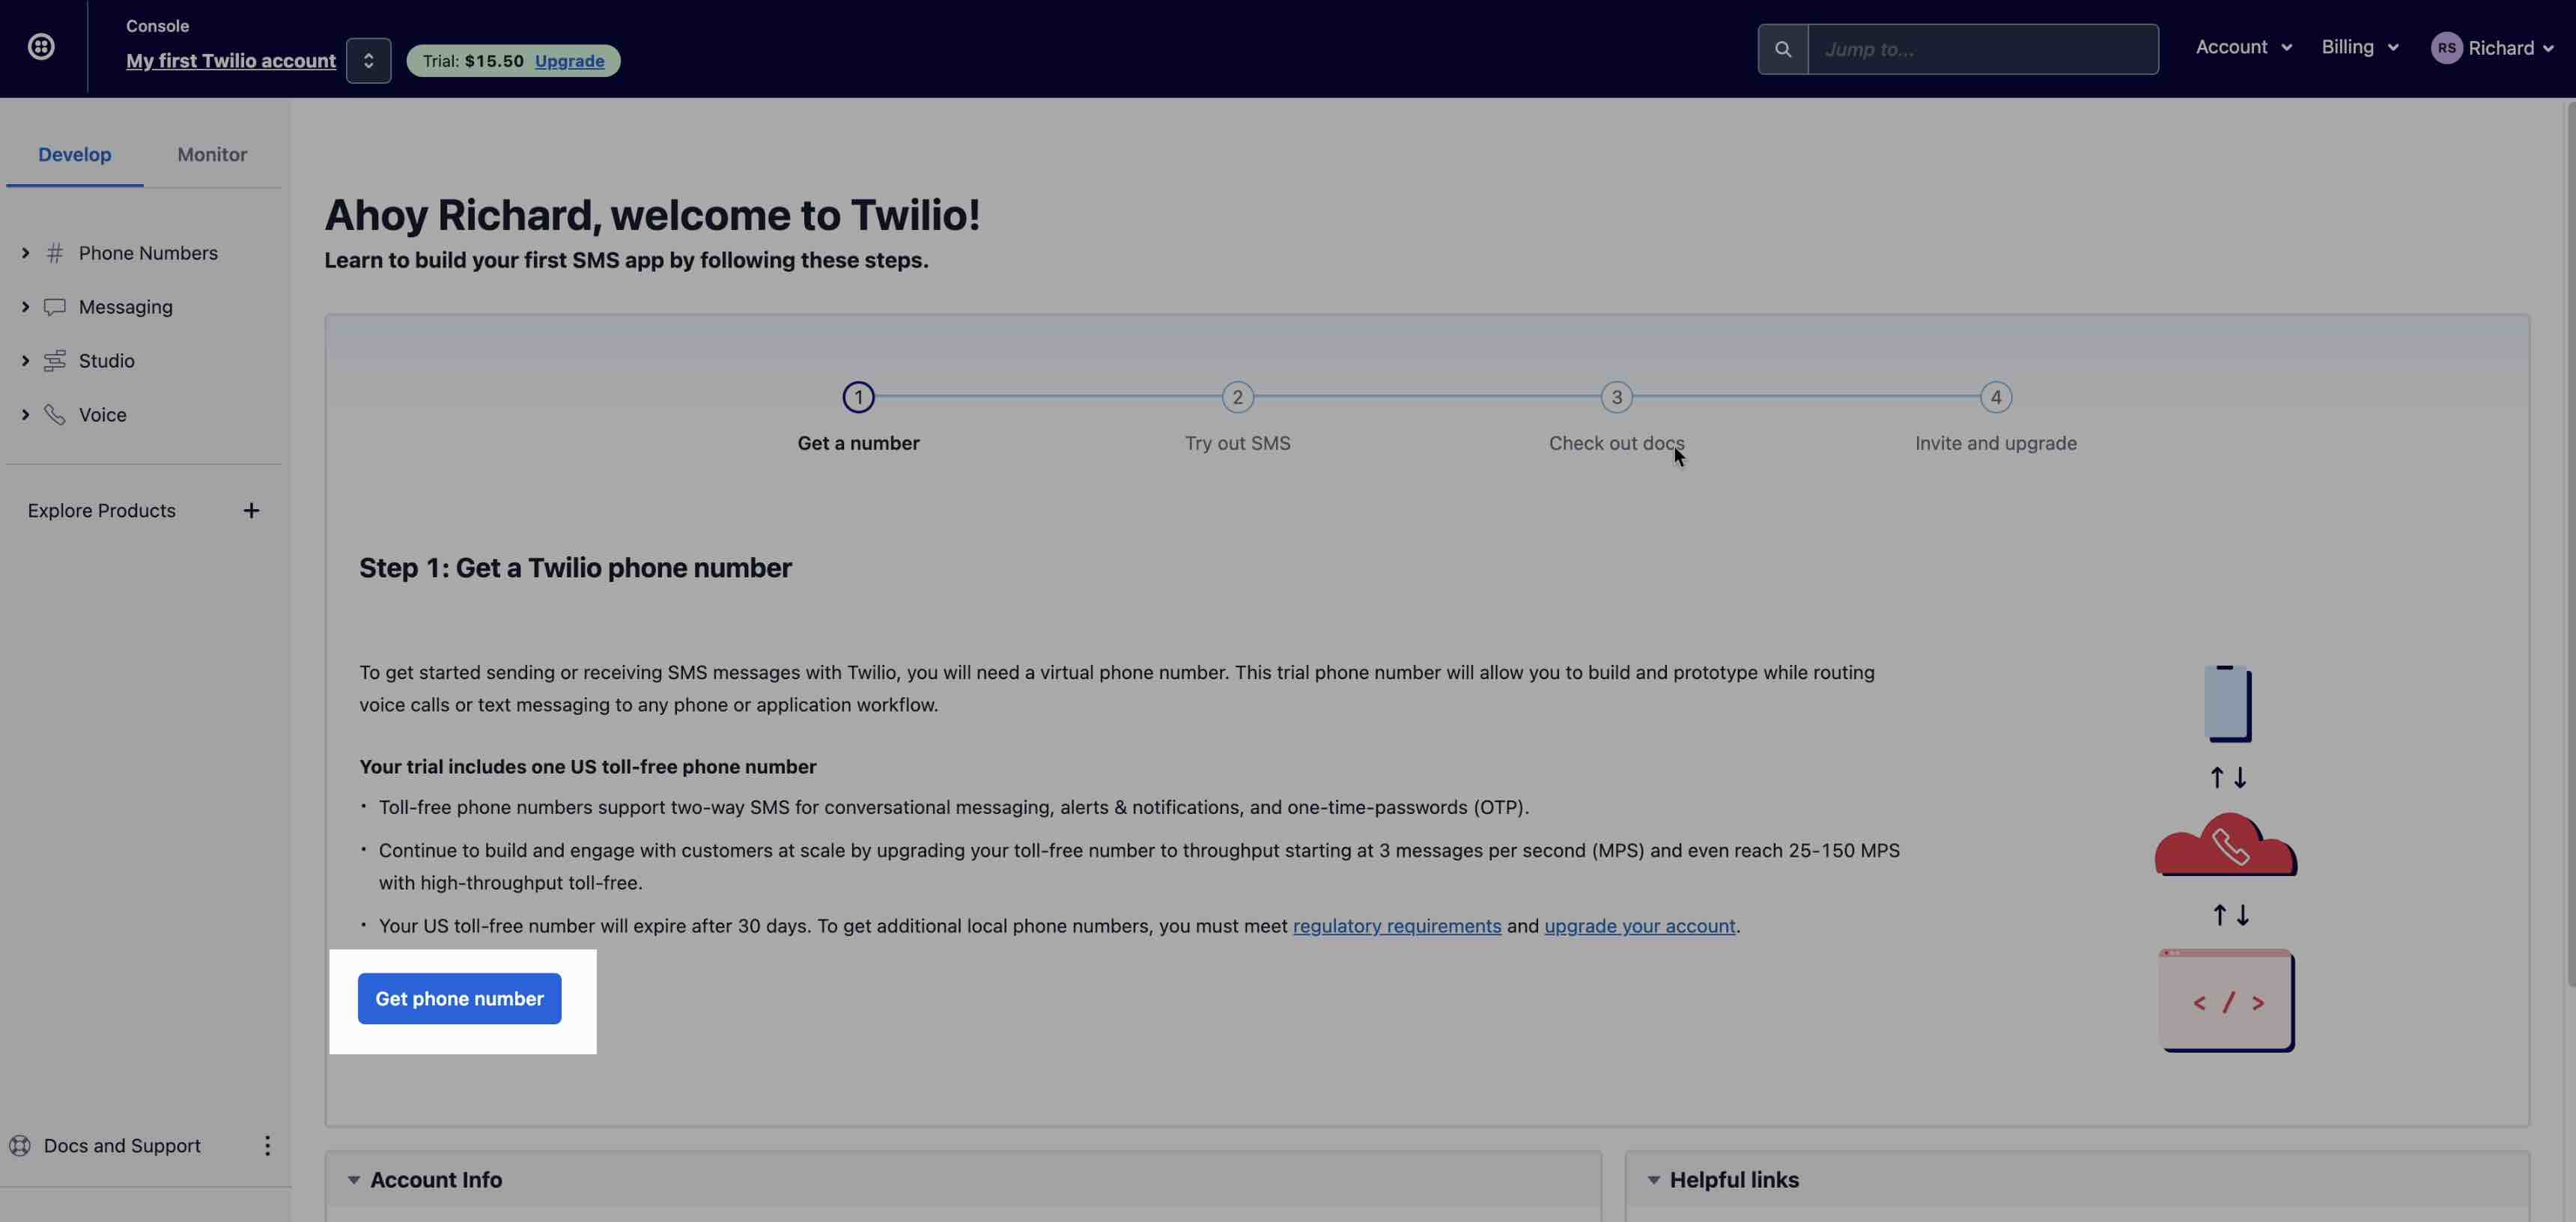
Step 2: Get a Phone Number (Under 1 minute)
On your Twilio dashboard, select the "Get a phone number" button to have a Toll-Free number assigned to you.
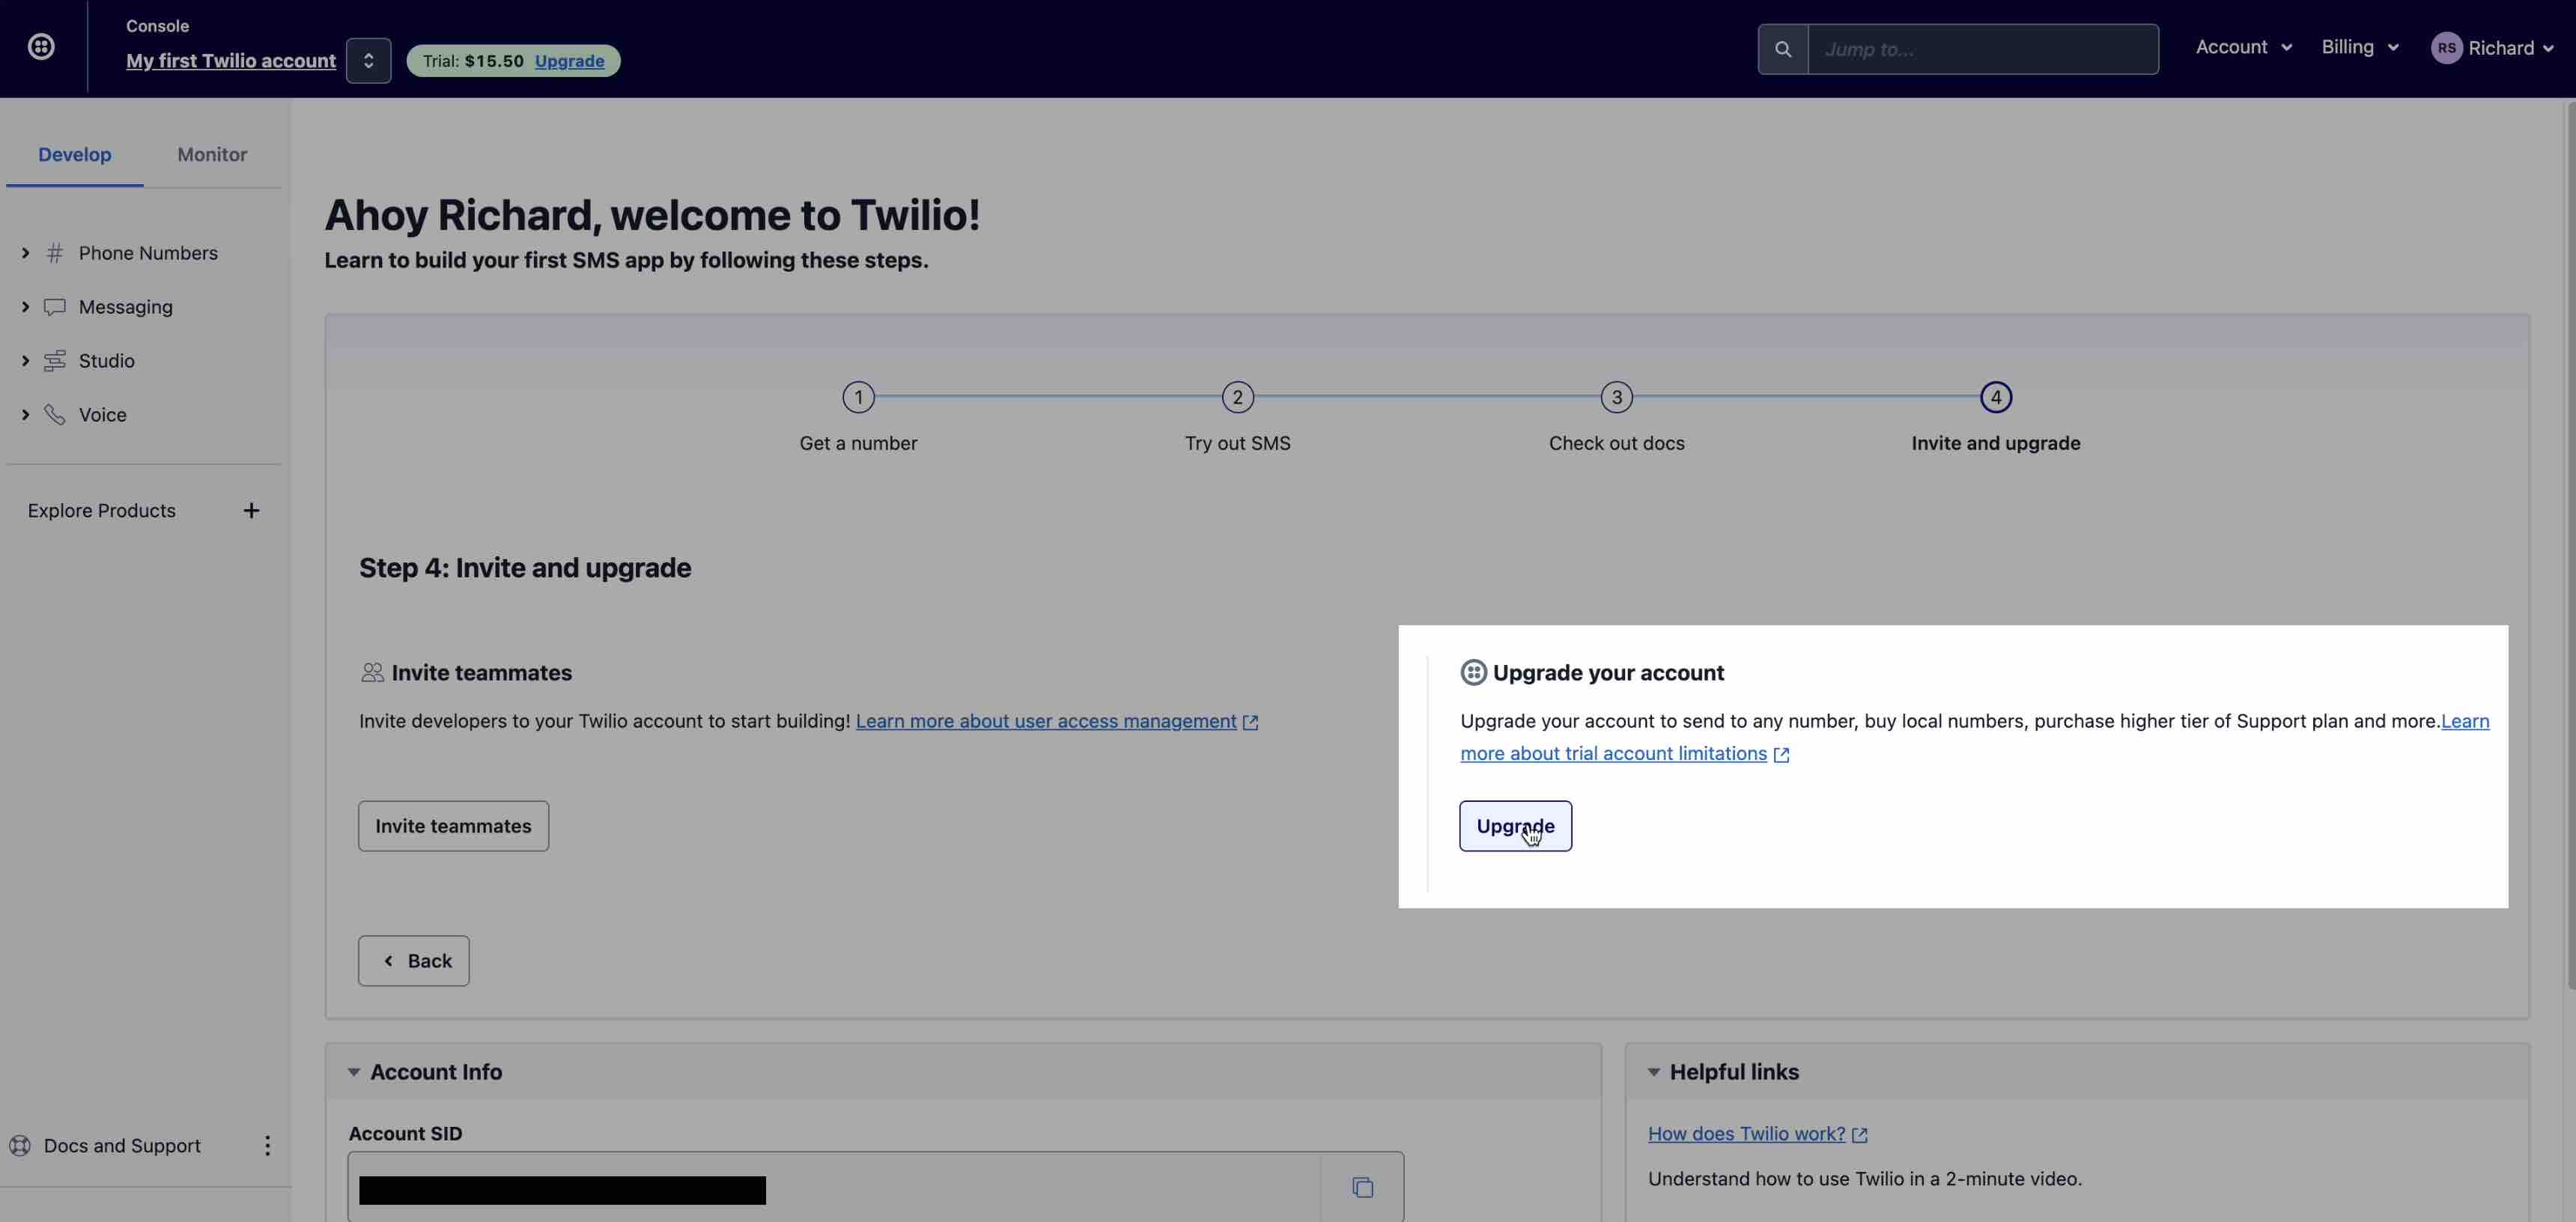
Step 3: Upgrade & Fund Your Twilio Account (2-5 minutes)
In order to send SMS messages with the ChurchTrac Twilio integration, you will need to upgrade your Twilio account to a paid account. Proceed by selecting the "Upgrade" button.
First, you'll need to verify your identity. You can use a valid, unexpired government-issued ID, Passport, or any of the other options listed in the screenshot below.

Next, you'll need to verify the country listed on your ID.

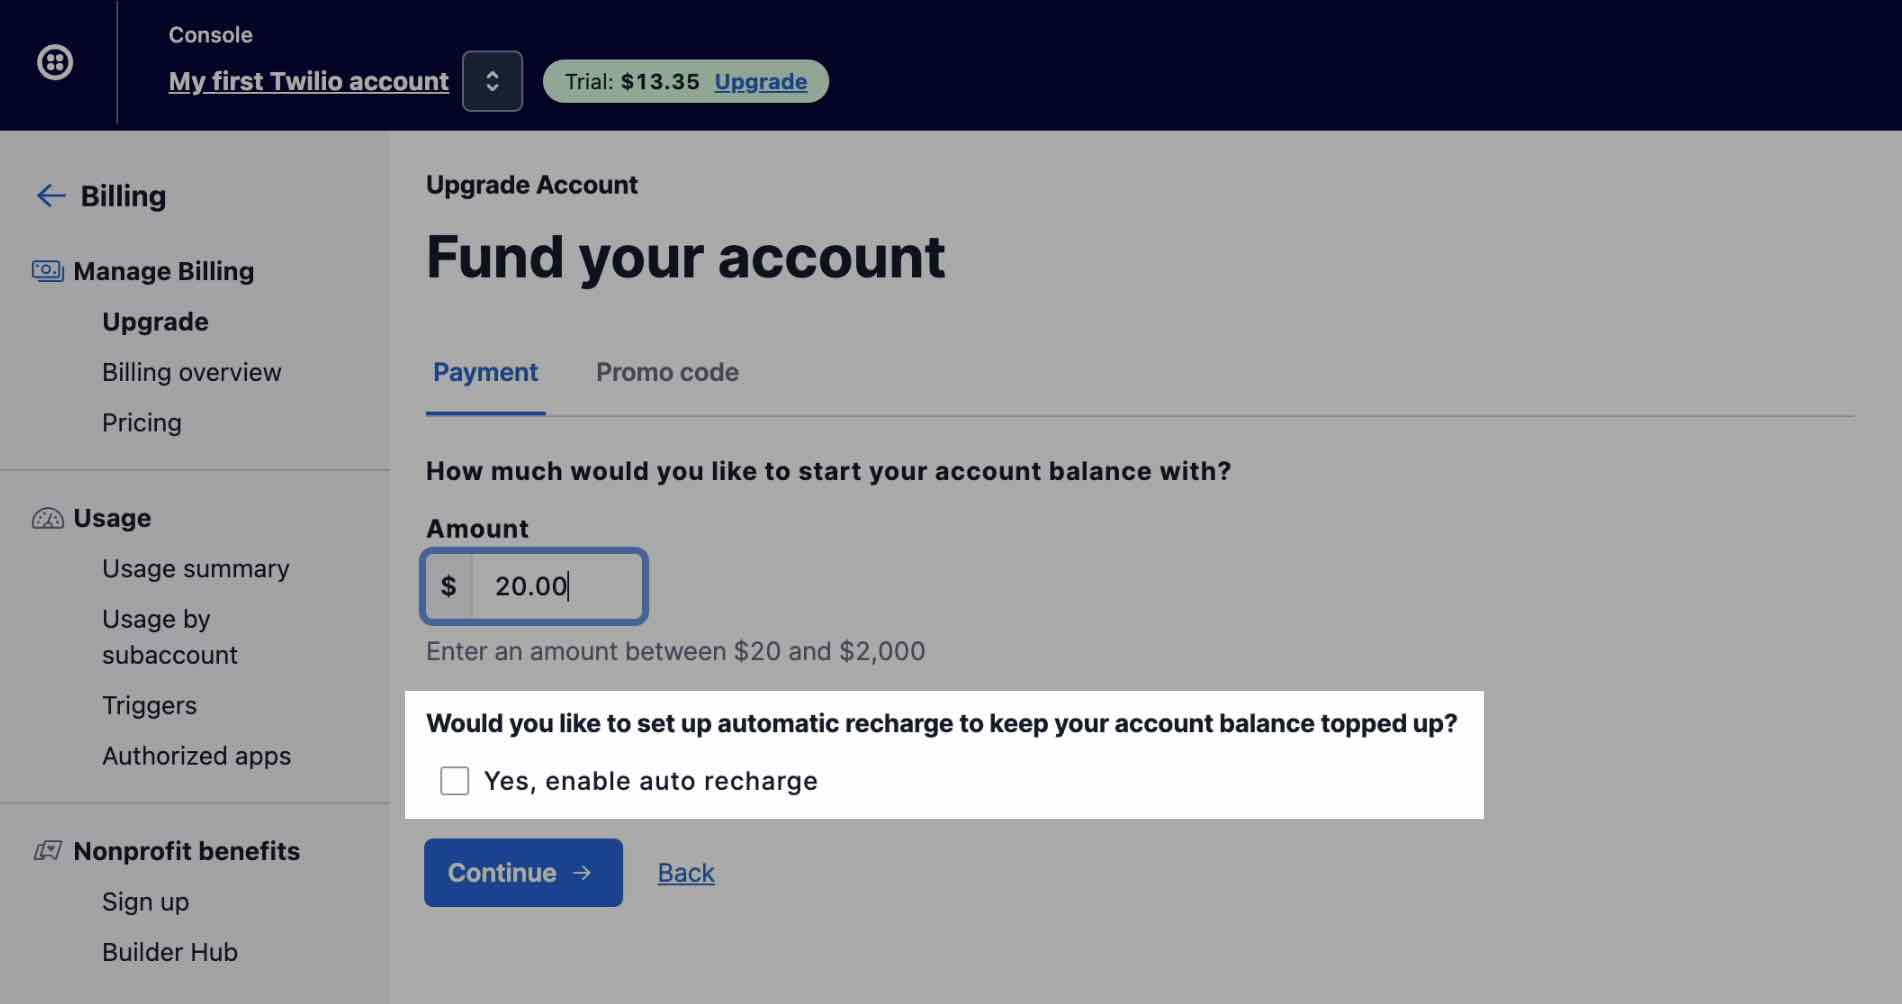
Once you've verified your identity, you can proceed to the next step. Your account will need to be funded. Twilio has a minimum of $20 for funding your account. We recommend enabling automatic recharge for your account to avoid having to continuously log into Twilio to add funds.
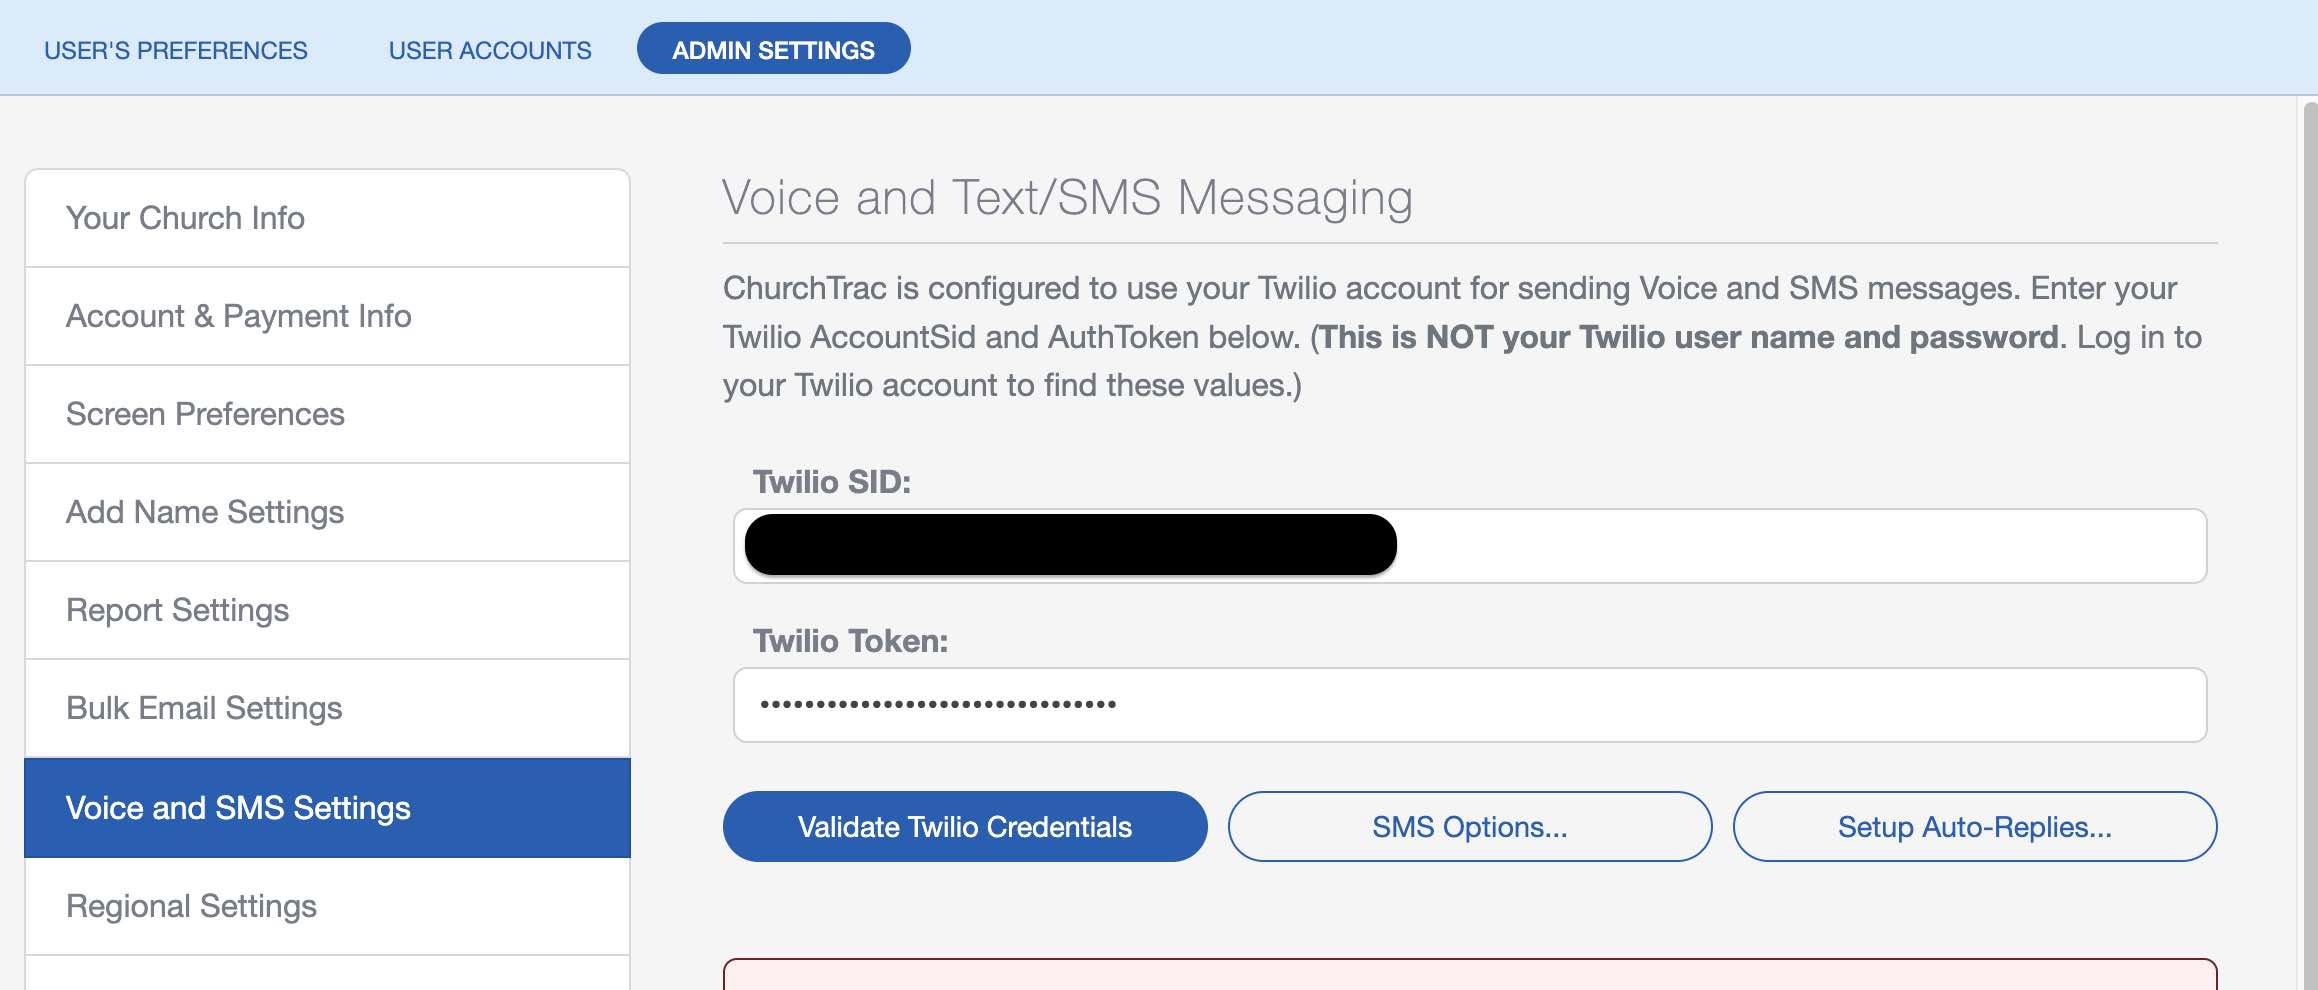
Step 4: Link ChurchTrac to Twilio (1-2 minutes)
Now that you have a Twilio number, you can link it to your ChurchTrac Account. From your Twilio Dashboard, you will copy and paste both your Account SID and your Auth Token from Twilio to be entered into ChurchTrac.
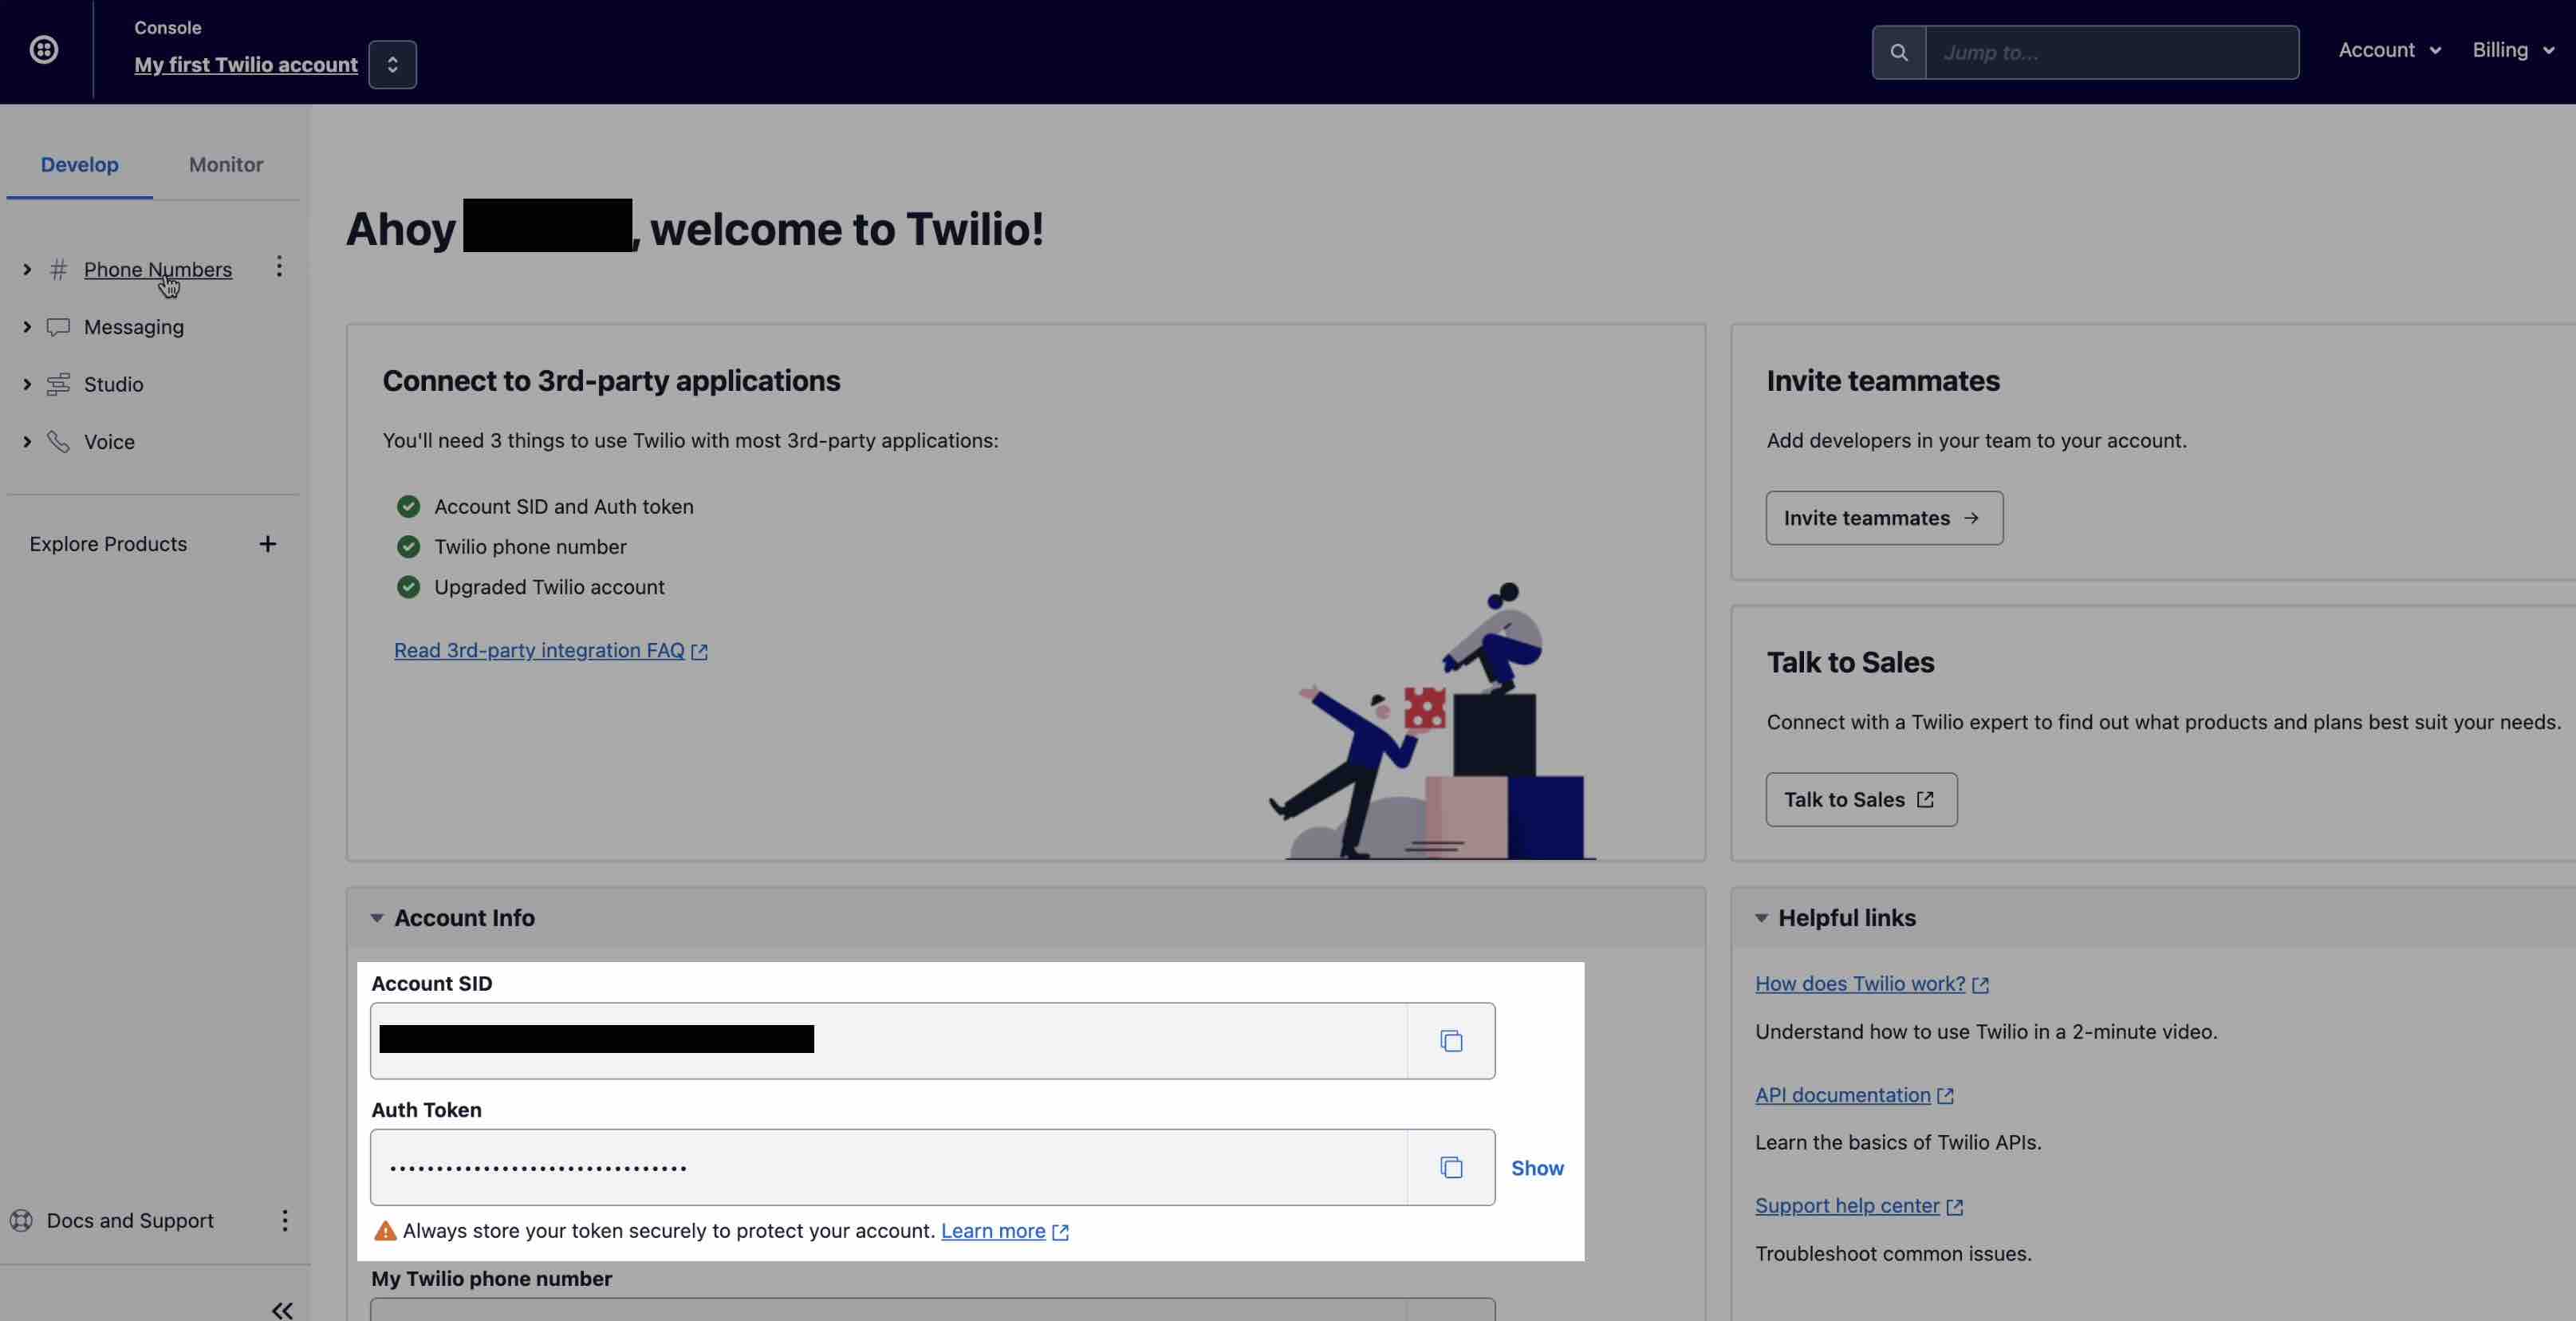
In ChurchTrac, go to SETTINGS ADMIN SETTINGS VOICE AND SMS SETTINGS to paste your Account SID and Auth Token from Twilio. Once pasted, select "Validate Twilio Credentials". Your SMS number will appear once the credentials have been validated. This should happen almost immediately.
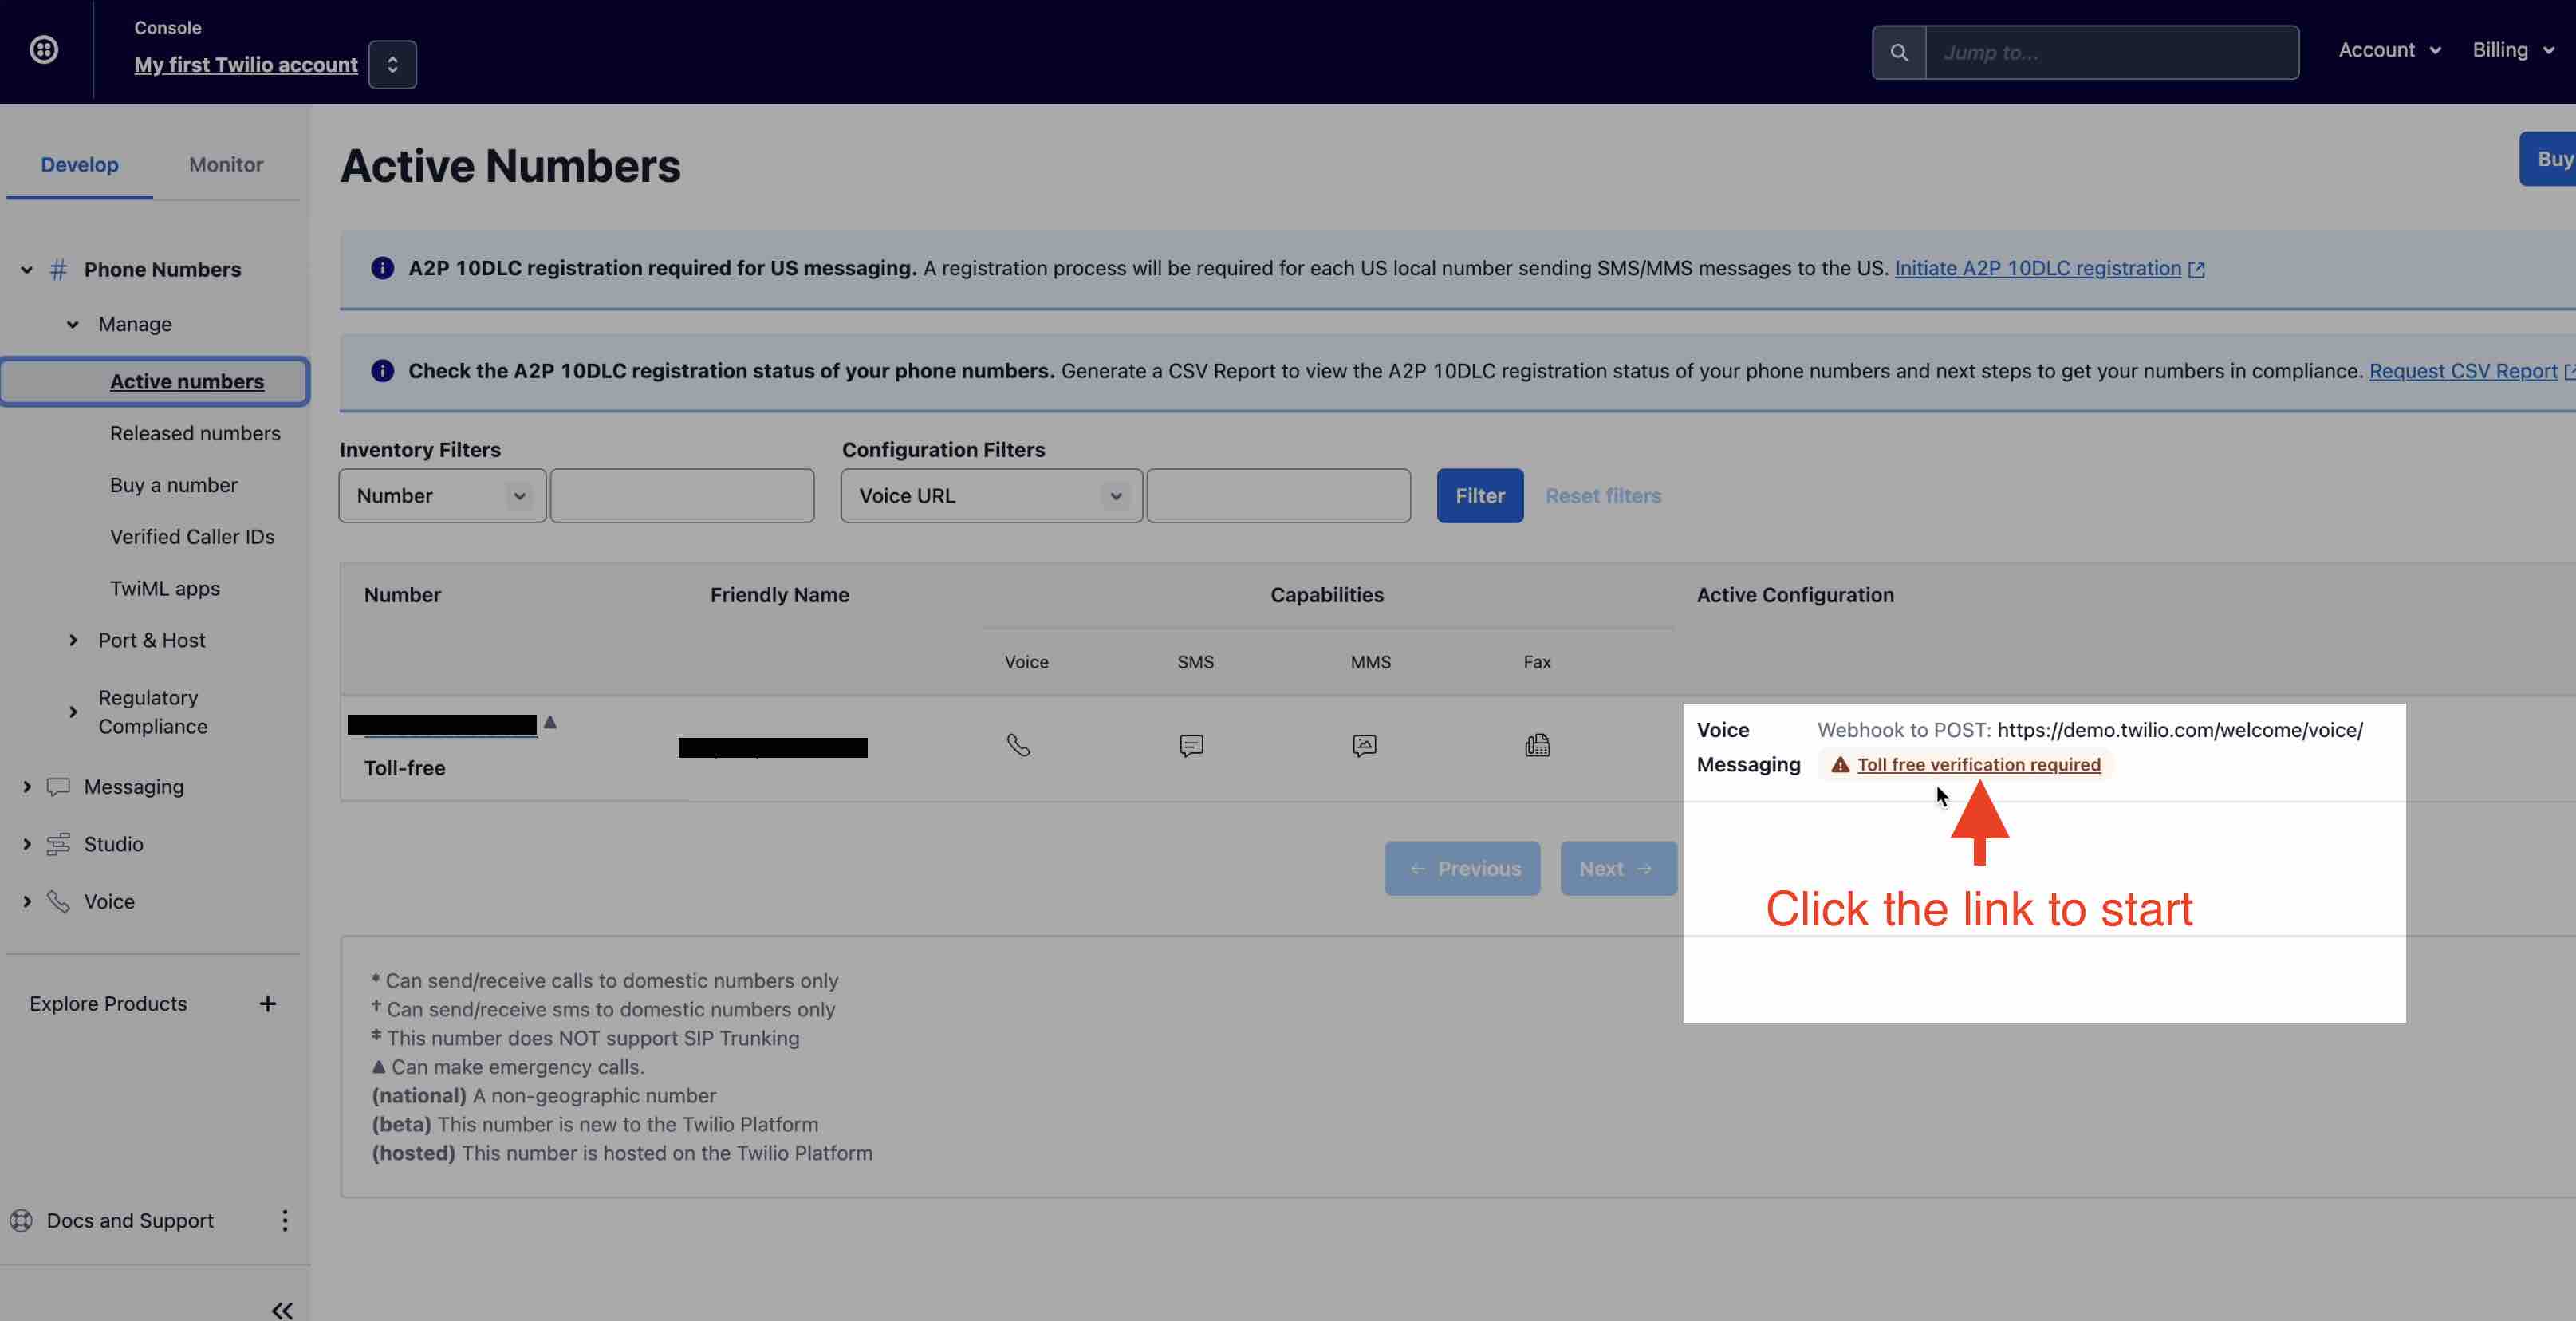
Step 5: Verify Your Toll-Free Number (48-72 hours)
First, on your Twilio Dashboard, navigate to PHONE NUMBERS MANAGE ACTIVE NUMBERS. Then, select the "Toll Free Verification Required" link.
Next, fill out the required information below. Ensure you enter your current church website (or Church Connect) URL in the "Website URL" field.
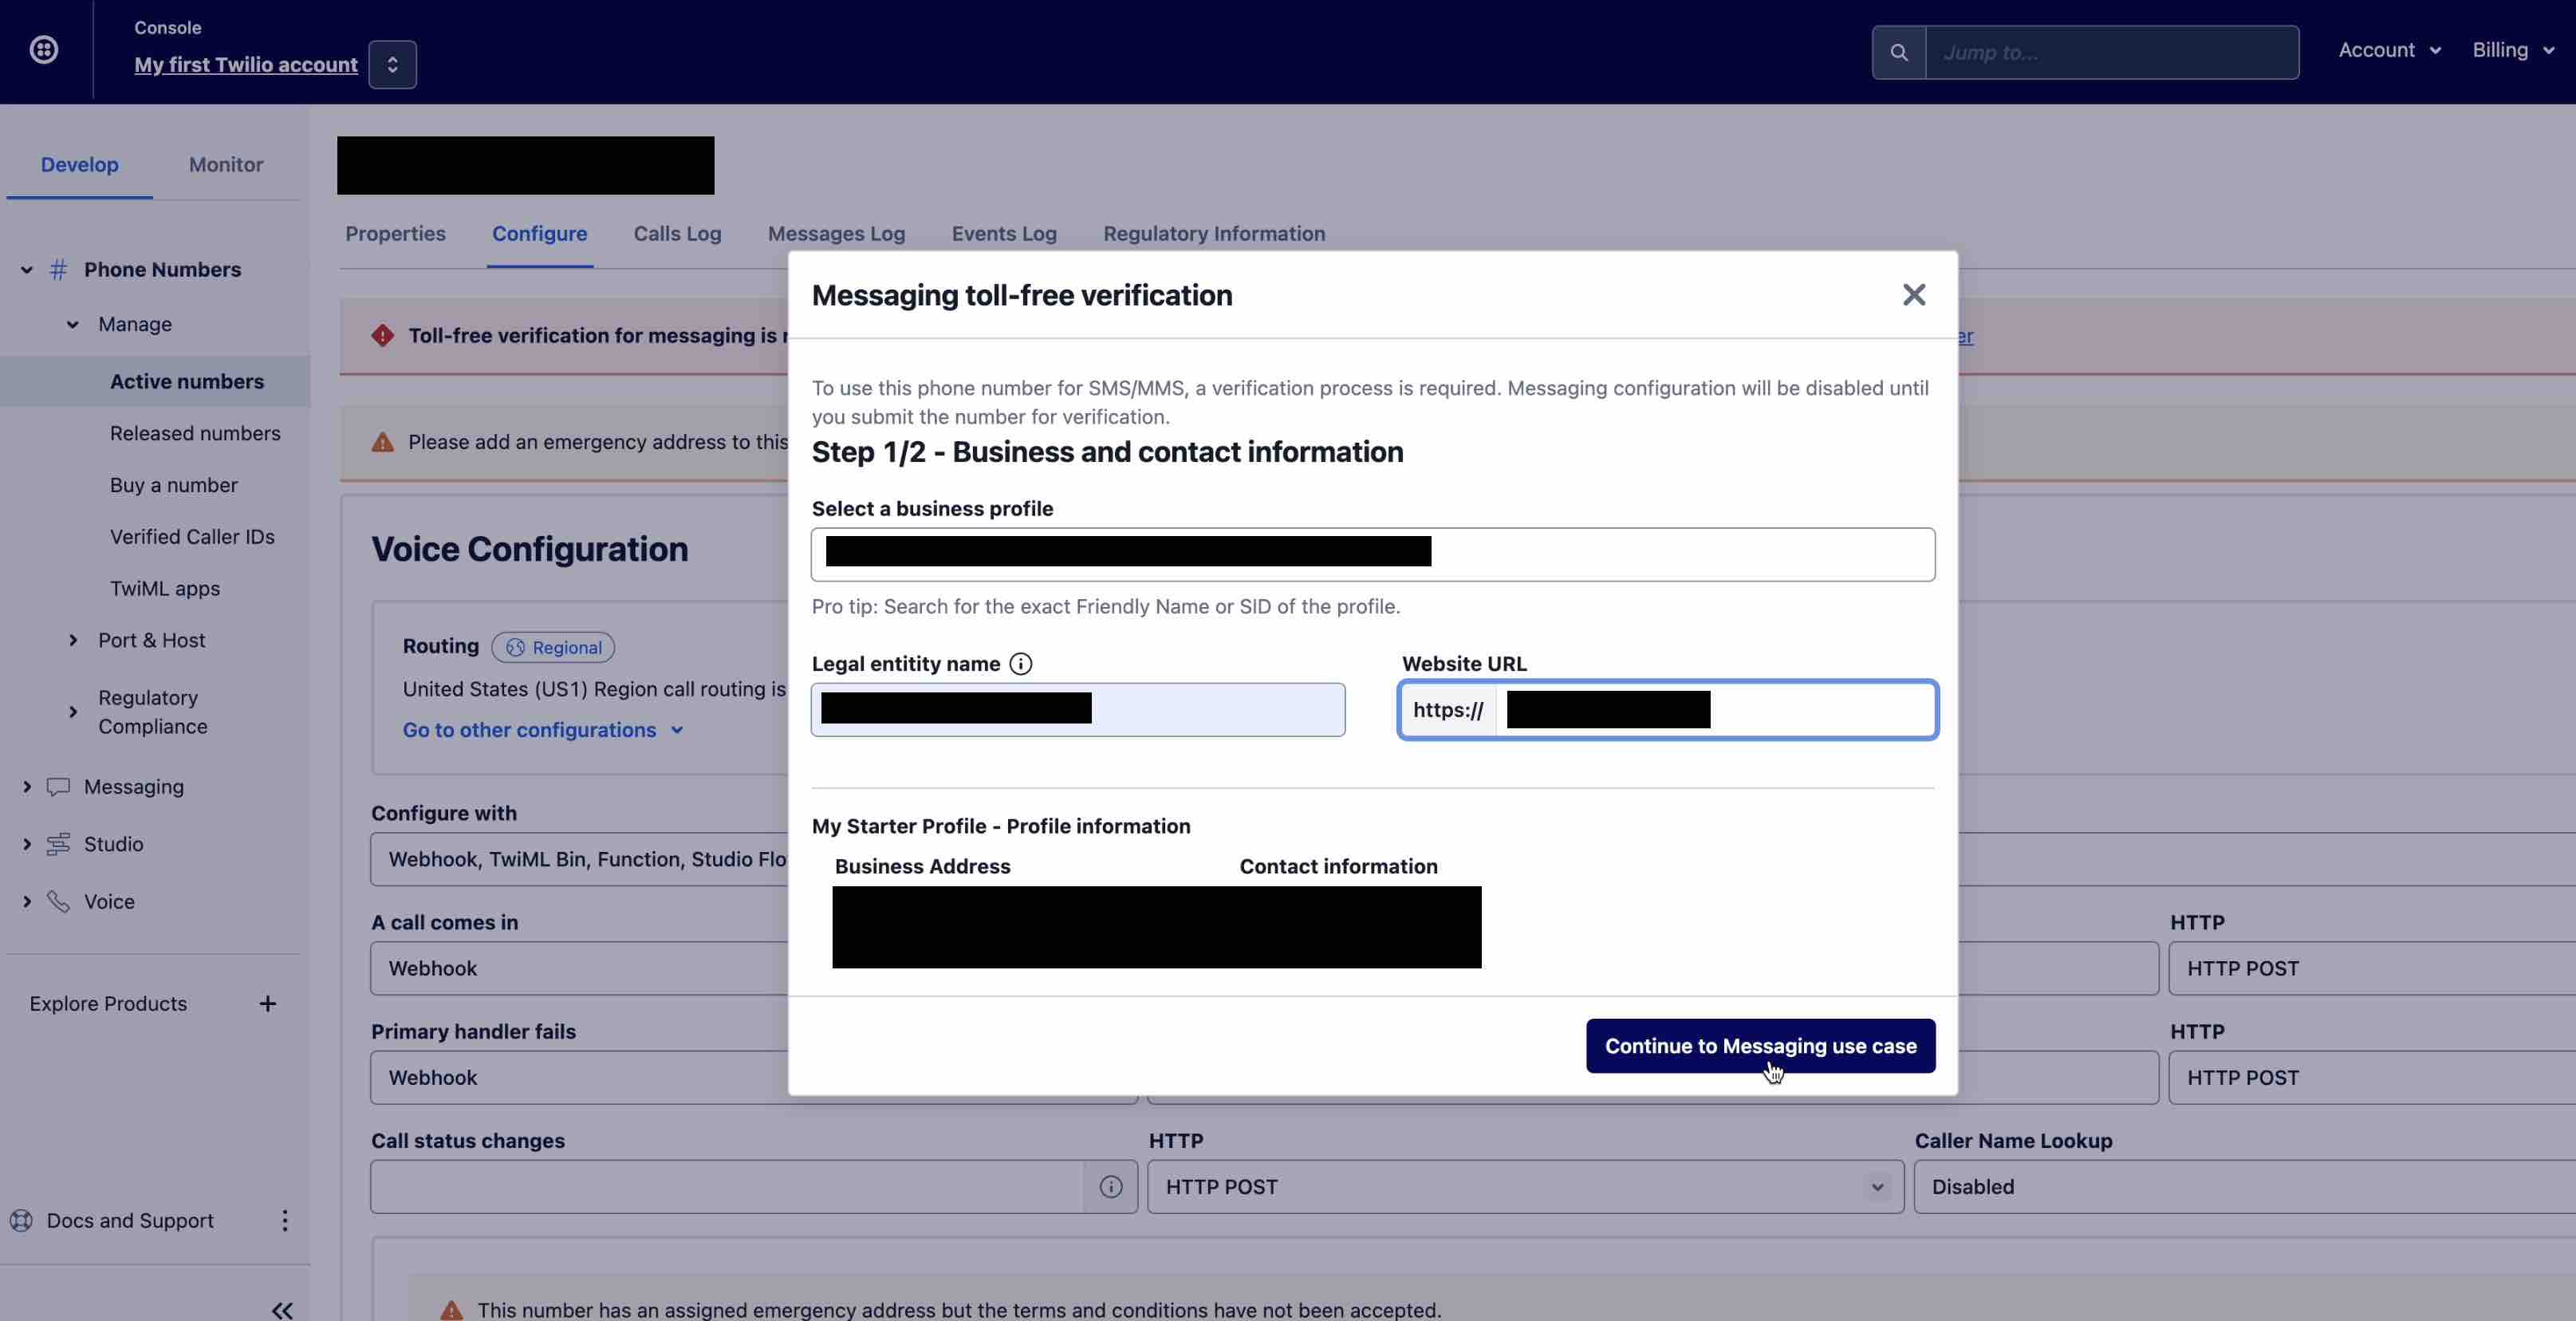
Continue entering the required information below. Your business location will be the physical location of your church/ministry.
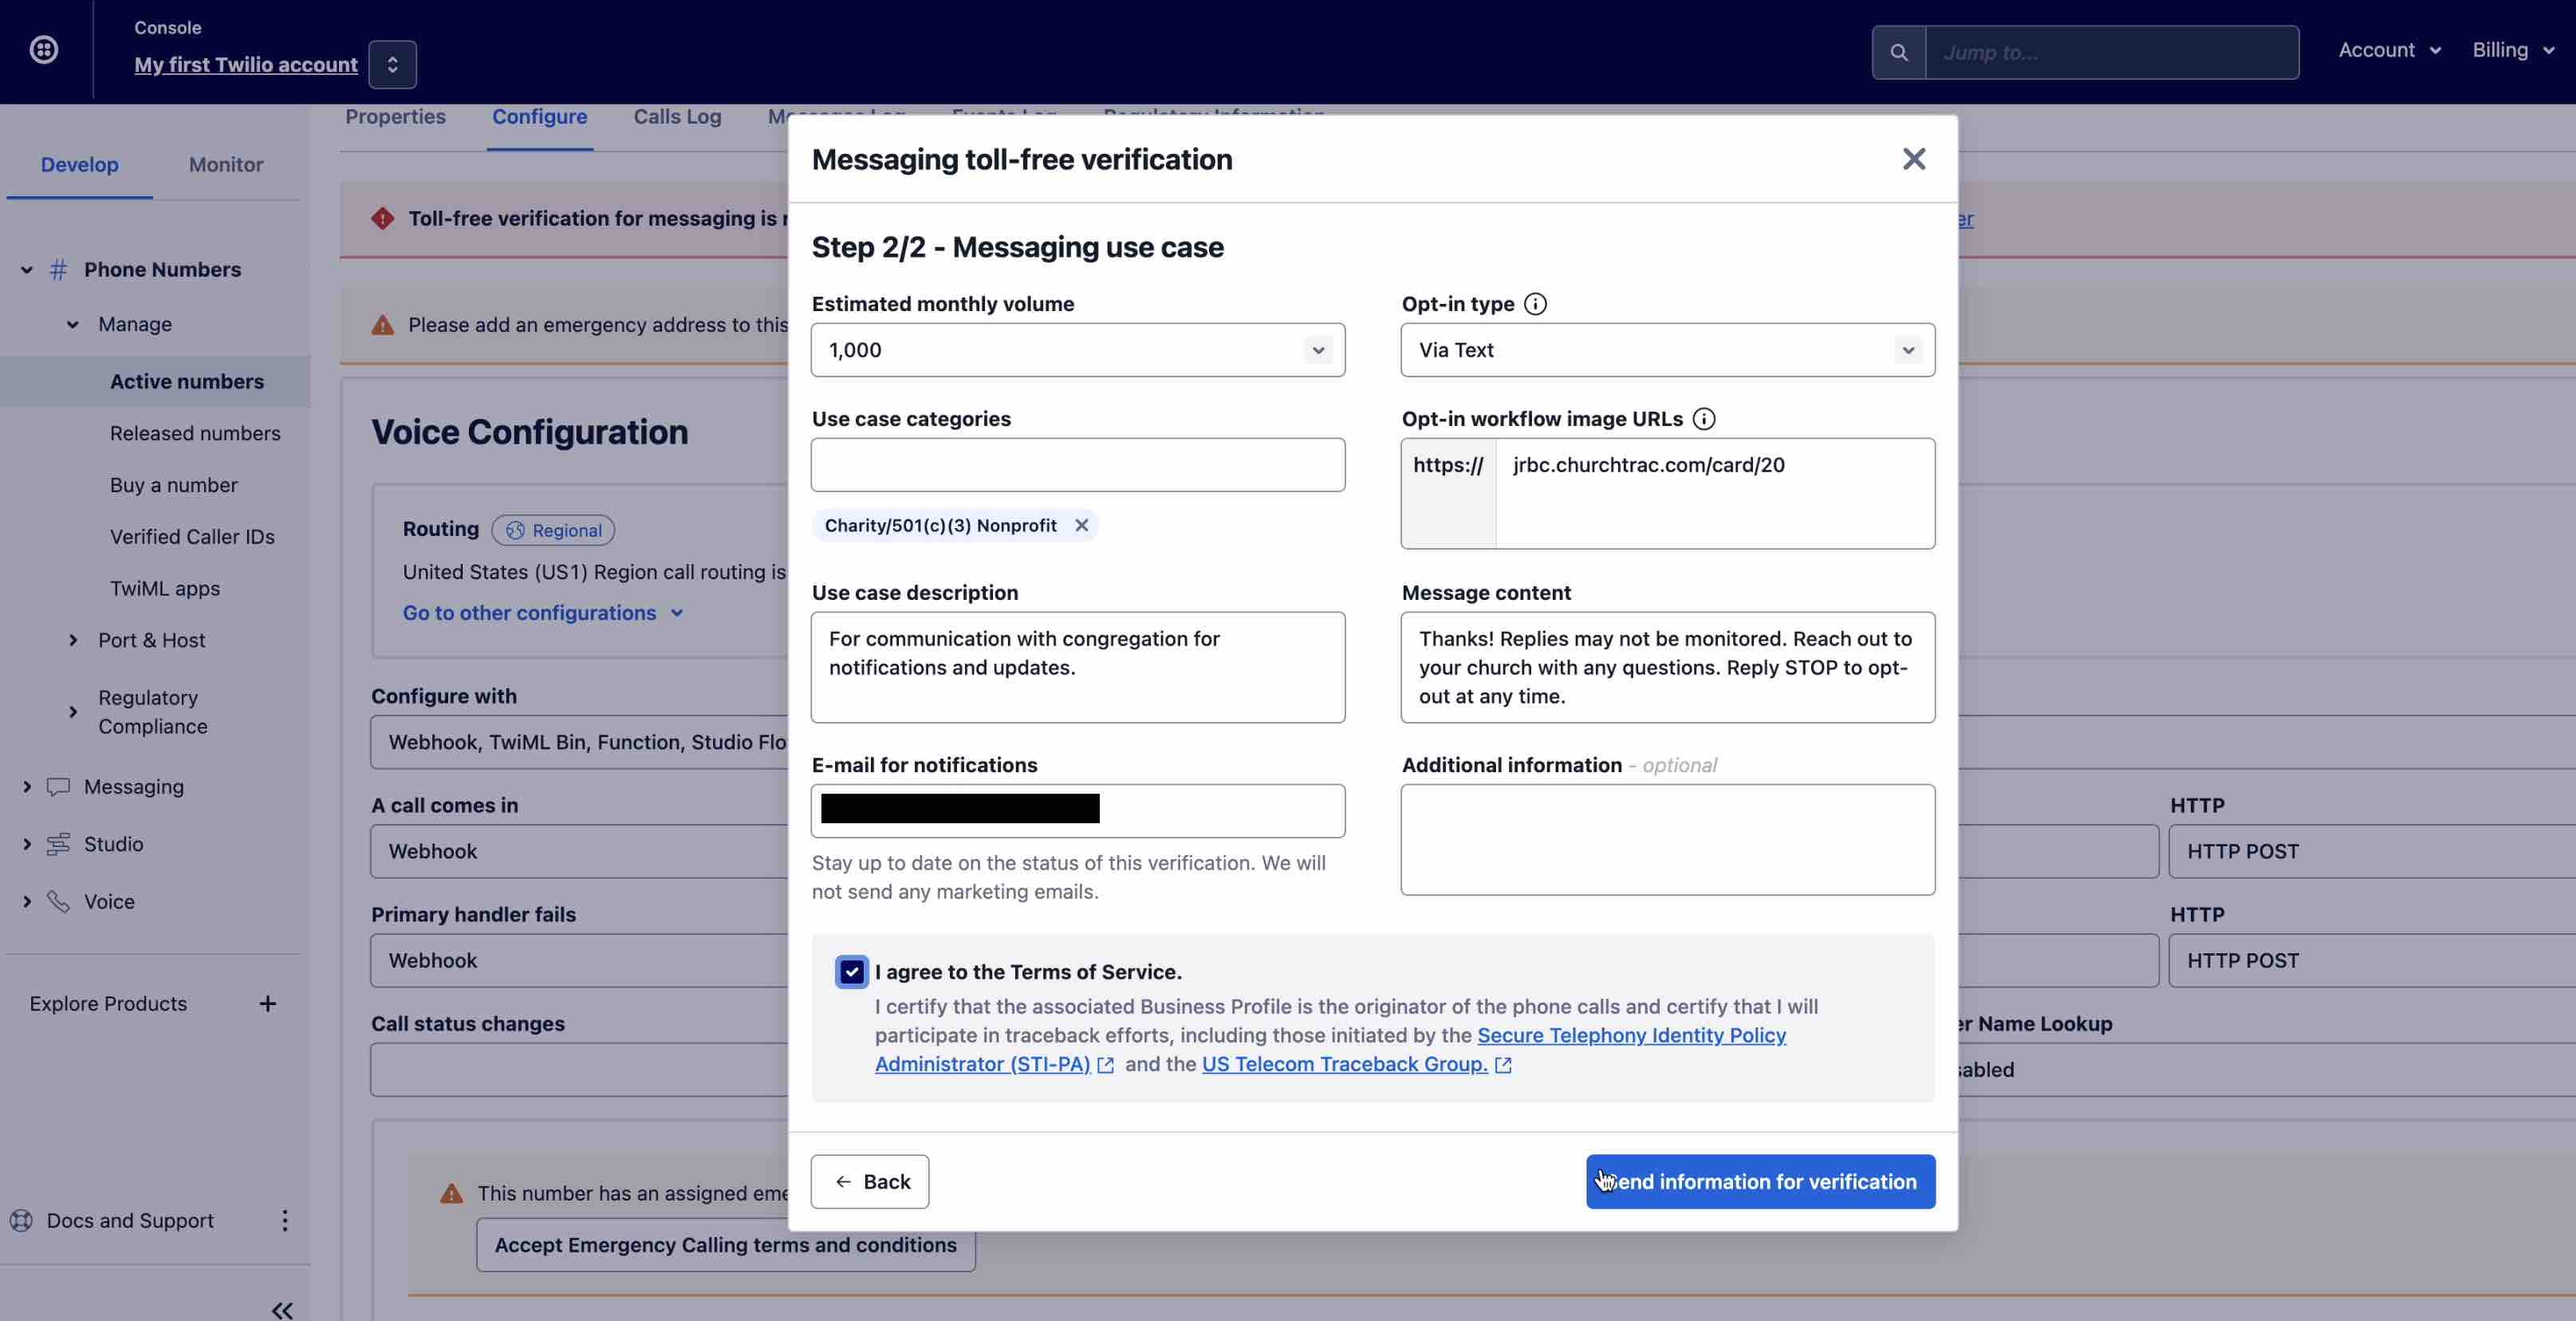
Thirdly, you will need to describe your messaging use case to Twilio. Once you have created a form card in Church Connect, fill in the required information and copy the form card URL into the "Proof of Consent (opt-in) collected" field.
- Estimated monthly volume: Select the volume.
- Use case categories: Select "Charity/501(c)(3) Nonprofit"
- Use case description: "For communication with congregation for notifications and updates."
- E-mail for notifications: Use the email of the individual that will be managing your Twilio account (likely yourself)
- Opt-in type: "Via Webform"
- Proof of consent (opt-in) collected: Use the URL of your online opt-in form for text communications.
- Sample message: "Thanks! Replies may not be monitored. Reach out to your church with any questions. Reply STOP to opt-out at any time."
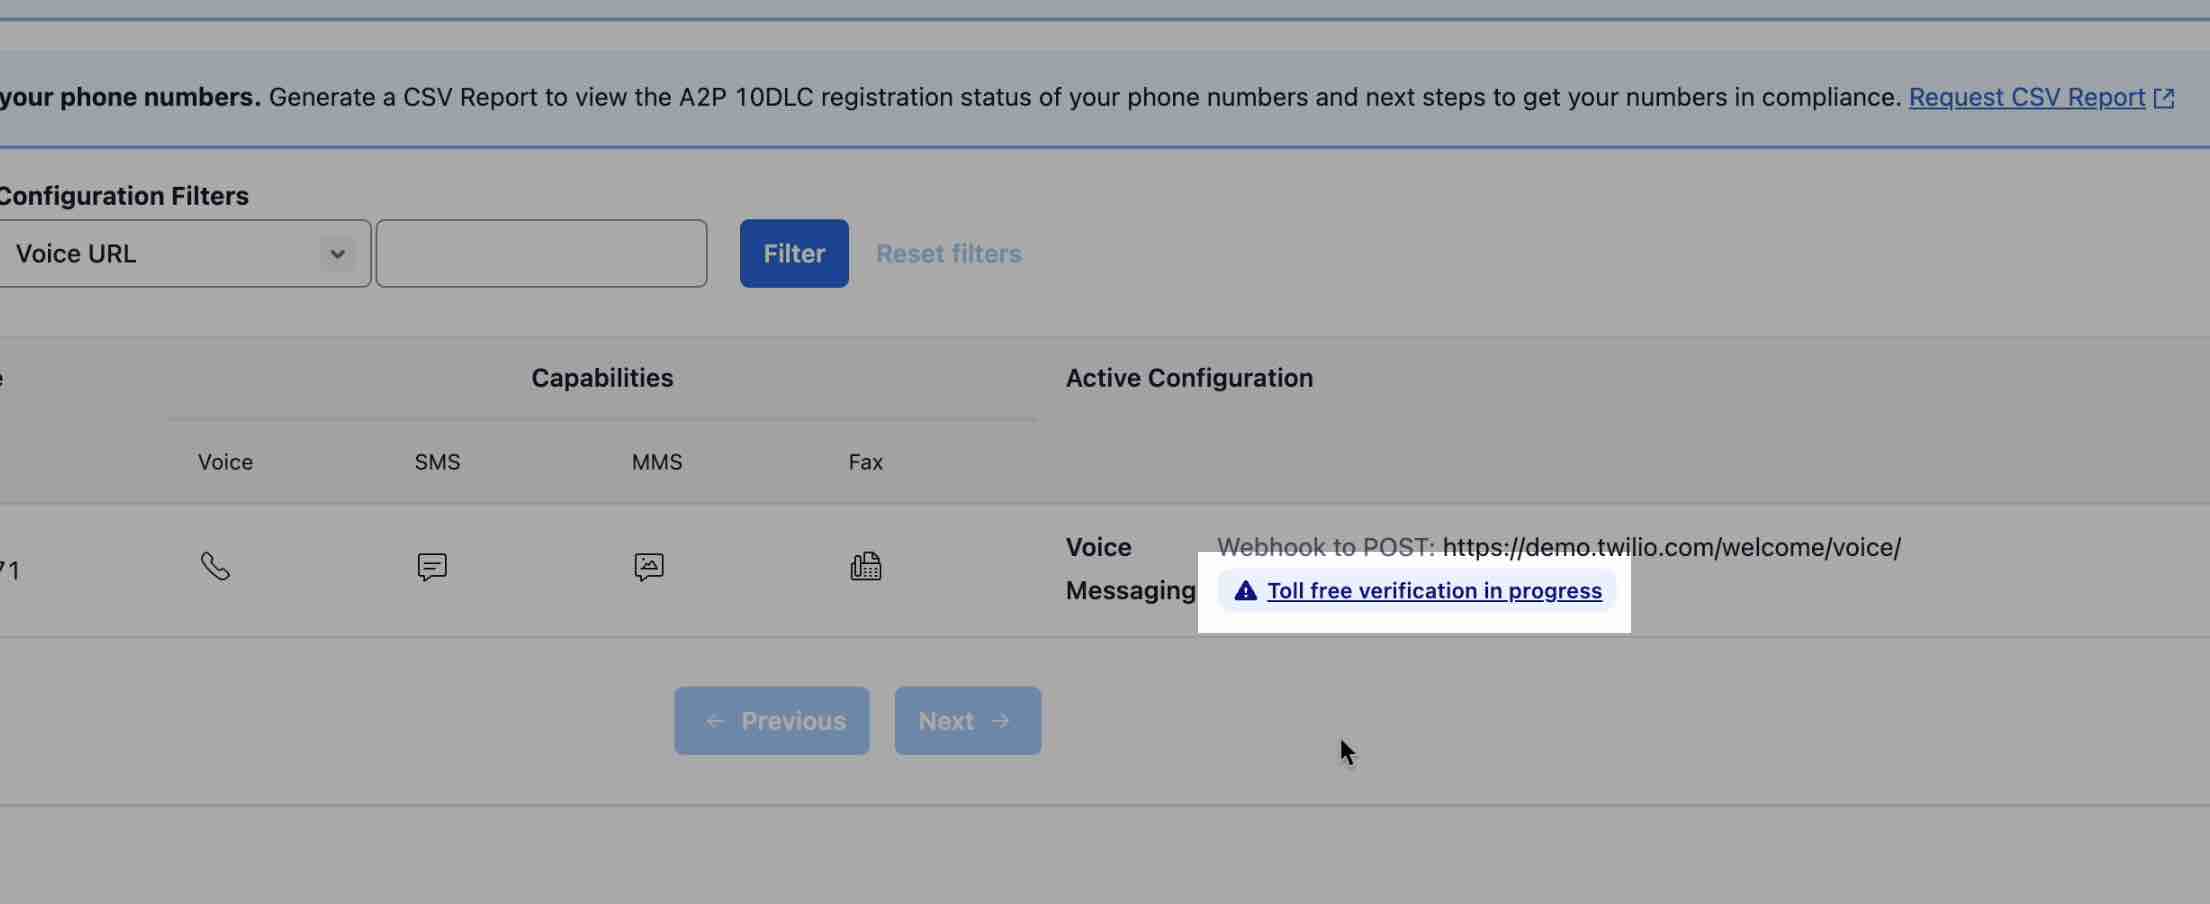
Once completed, your number will then show "Toll free verification in progress". Within minutes, you should automatically receive an email from Twilio letting you know that your toll free verification has been started.
Step 6: Send a Test Message (1-2 minutes)
After your Twilio number has been verified, you are ready to send a test SMS message. Proceed in sending a text message to yourself from ChurchTrac Messaging.
Before You Text Your Church
Step 1: Create a Contact Card and Share it
To start, provide your church’s contact information as a contact your congregation can save on their phones. By doing so they are consenting to their carriers they want to receive text messages and e-mails from the church.
Step 2: Read our User Guide on Preventing Blocked Emails and Texts
To make sure your church's communication reaches everyone effectively, it's crucial your members take specific steps to avoid issues like blocked messages. Follow these steps to ensure that your SMS messages and emails are delivered without any disruptions. Learn More ›
Fees Incurred During the Opt-In Process
Any and all messages sent back and forth during the opt-in process will incur fees. It's important to note, costs per message will vary depending on the platform you use and your region. Common interactions might include:
- The initial send
- An opt-in confirmation message
- A congregant’s opt-in reply
- A second message sent from the church
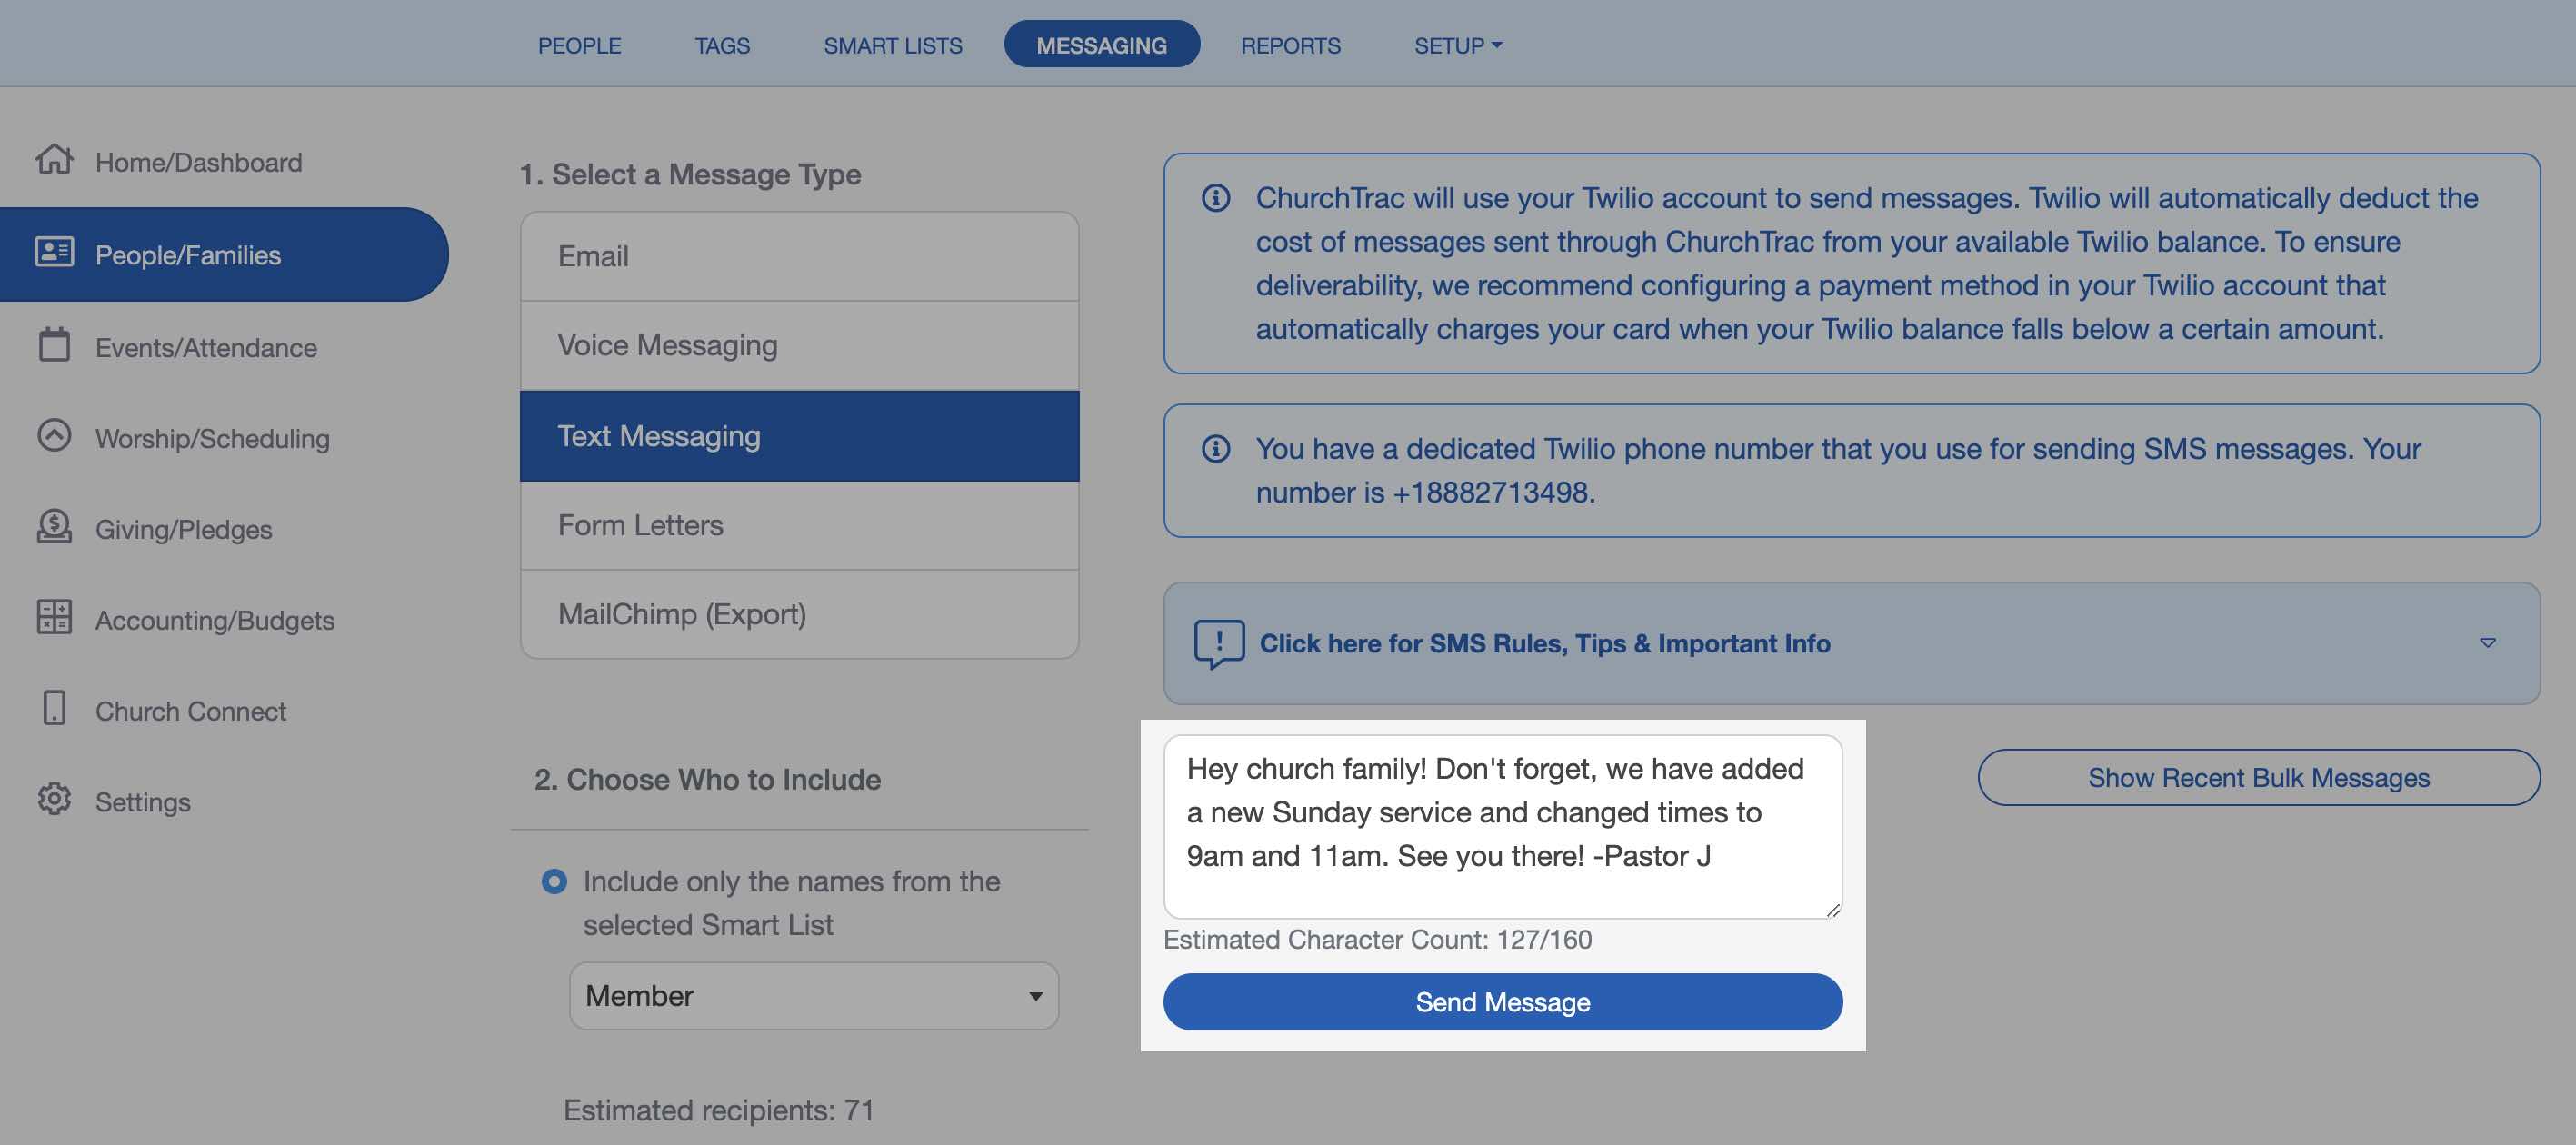
Sending Text Messages
Step 1. Select the Text Messaging Tab
The Text Messaging Tab is found by navigating to People > Messaging > Text Messaging.
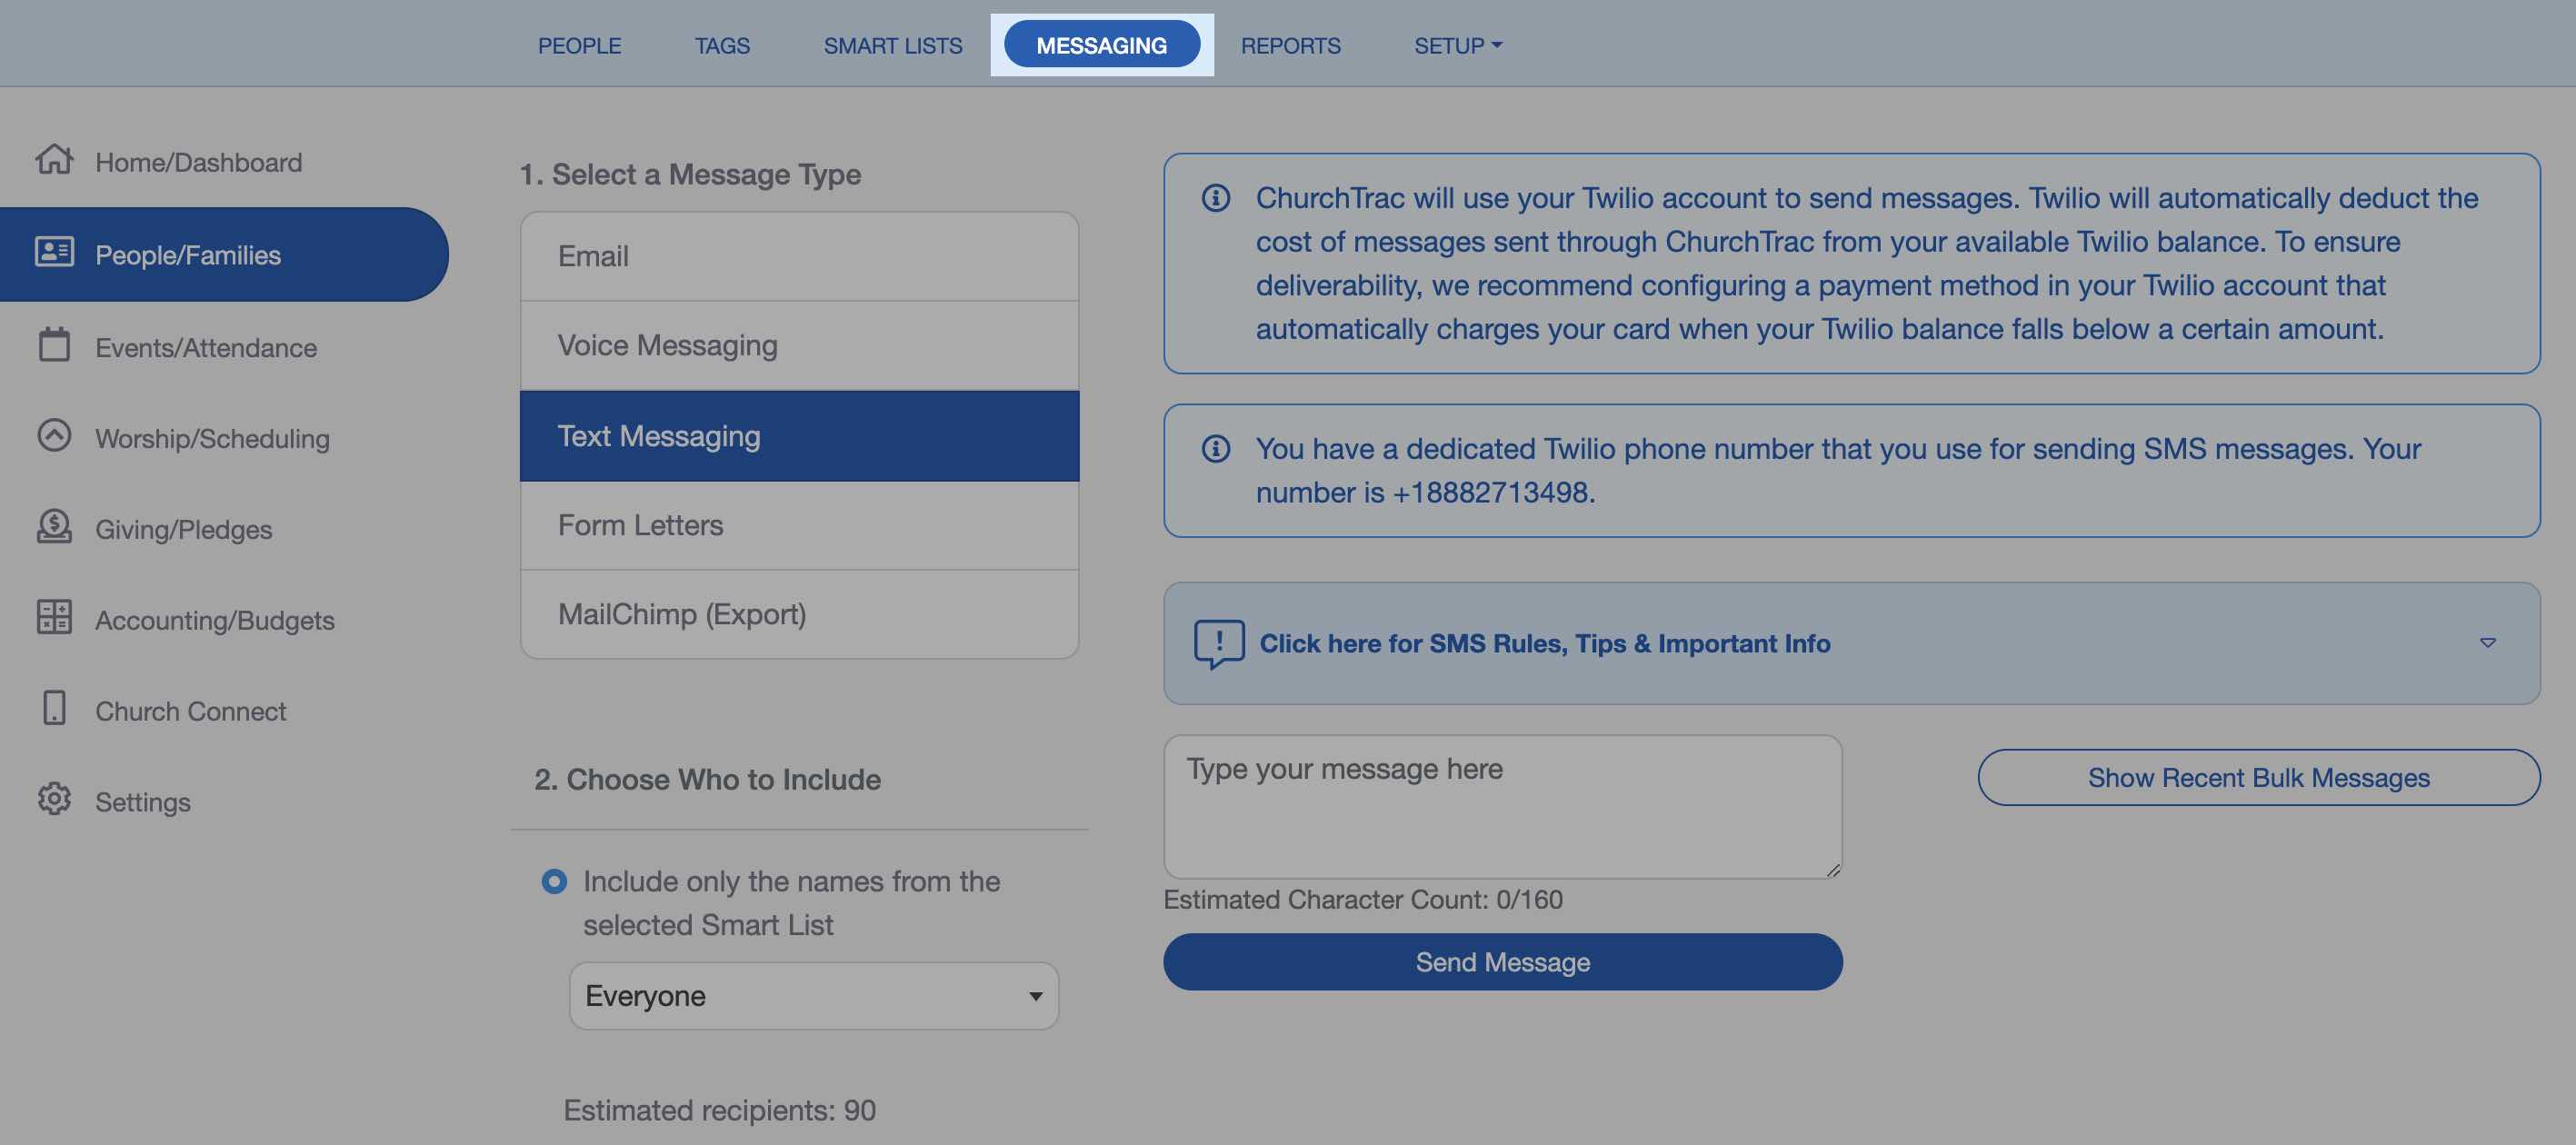
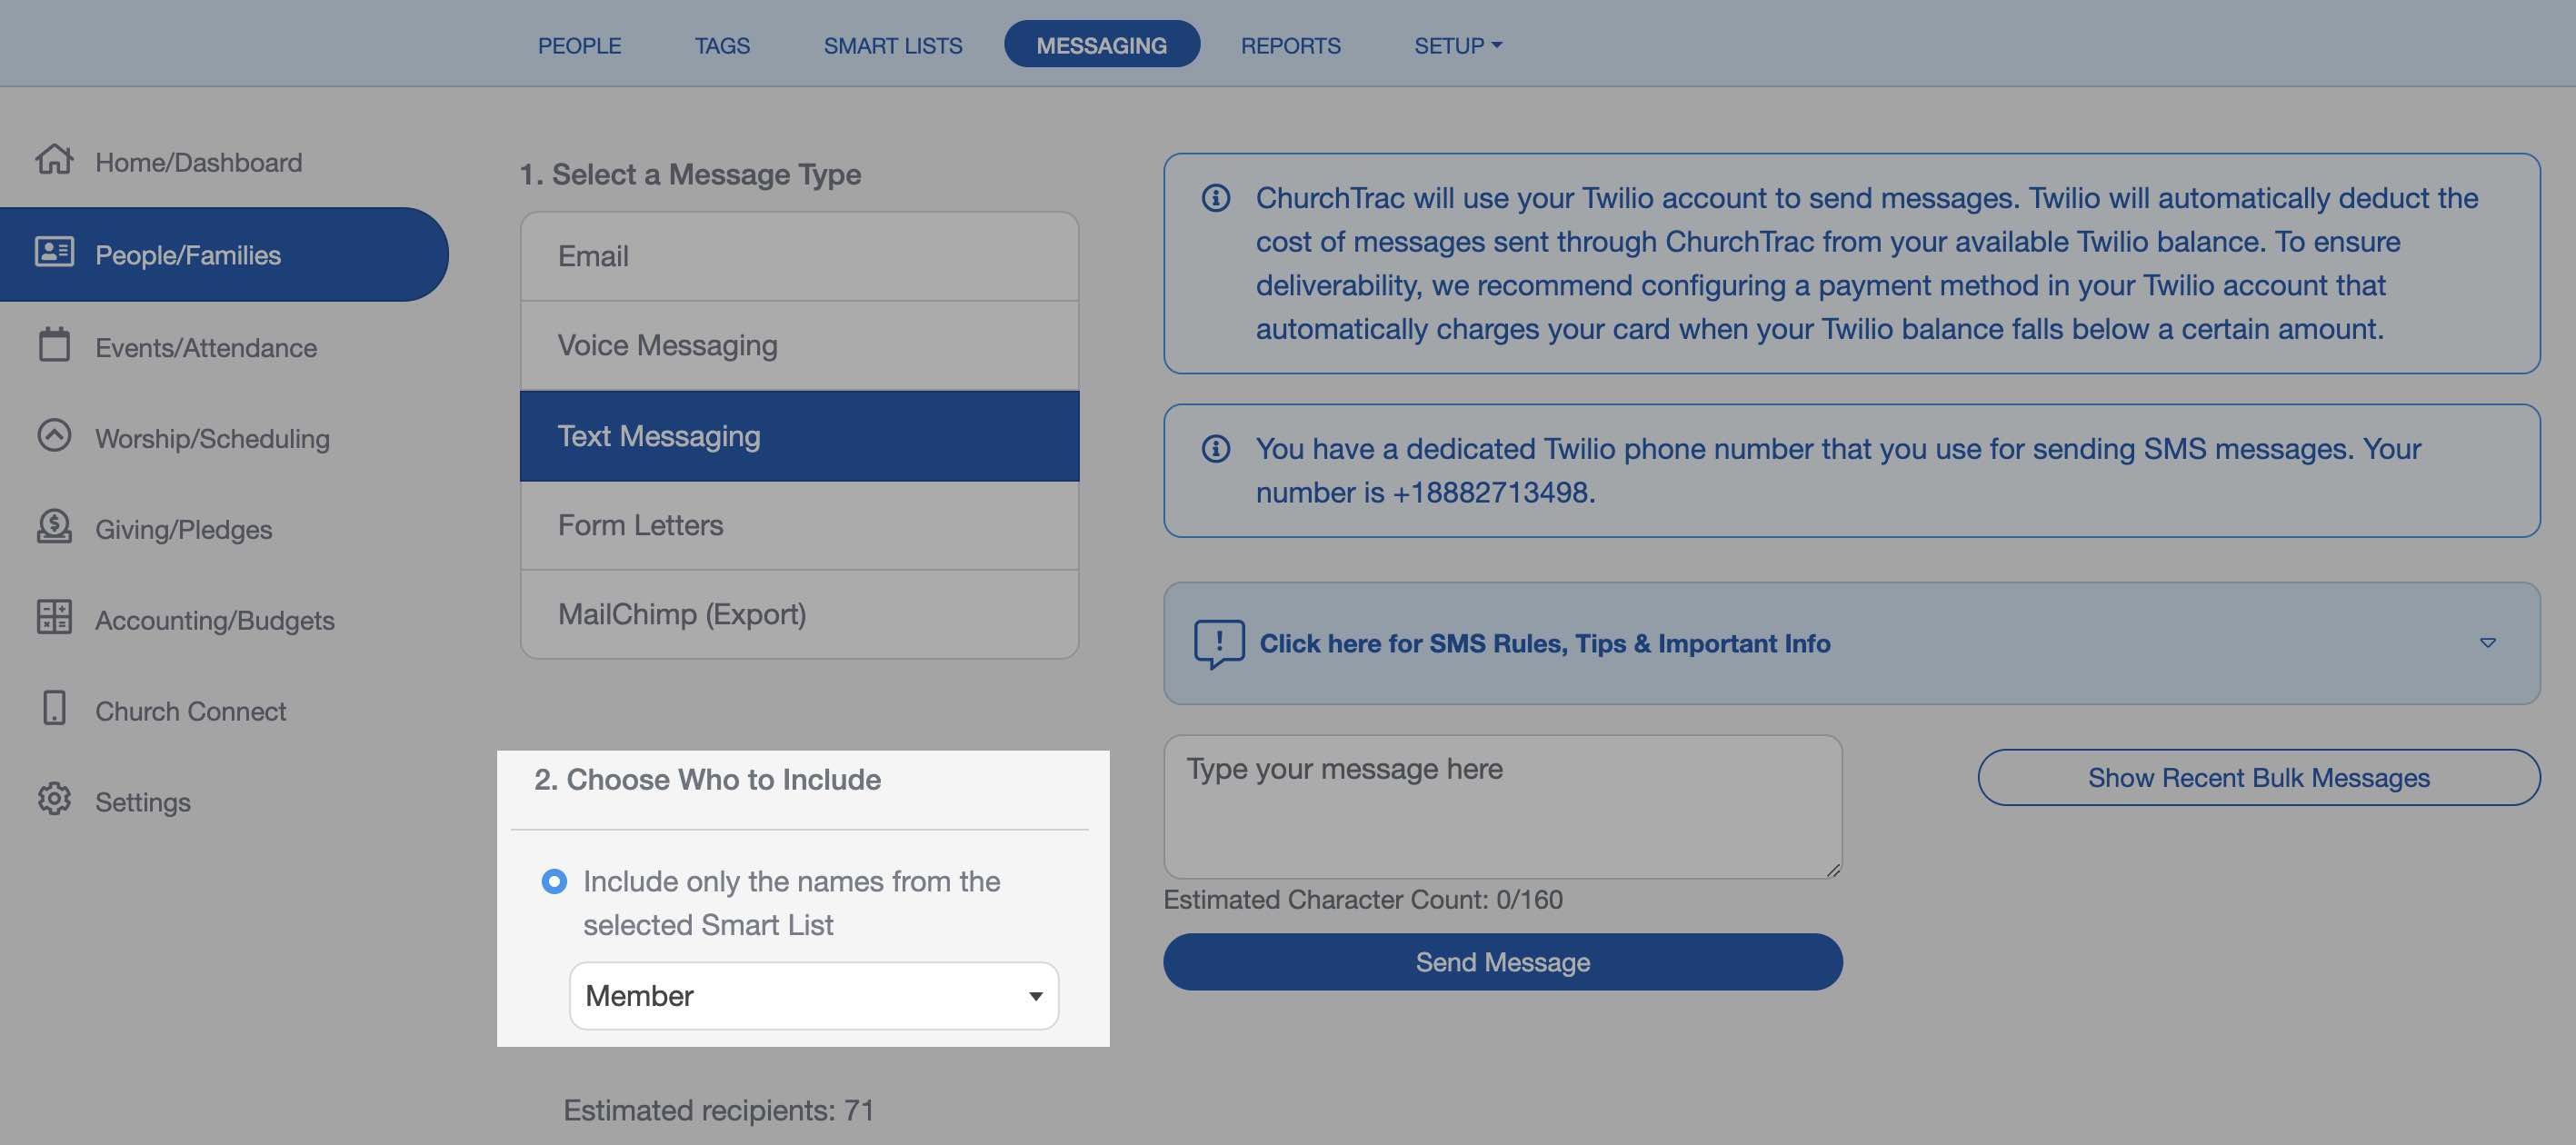
Step 2. Choose who to text
You are given the option to text individuals or a specific Smart List or Group. ChurchTrac will only send SMS messages to individuals with a phone number in the mobile number field.
If you only want to include the checked names in your message, check the names on the People Screen first.

Then open the Messaging screen and select the "Include only the names that are checked on the People Screen" option.

Step 3. Compose and send your text message
Your text message can be up to 160 characters. You also have the option to send your text message immediately or schedule to send it at a later day and time.
Setting up Auto Replies
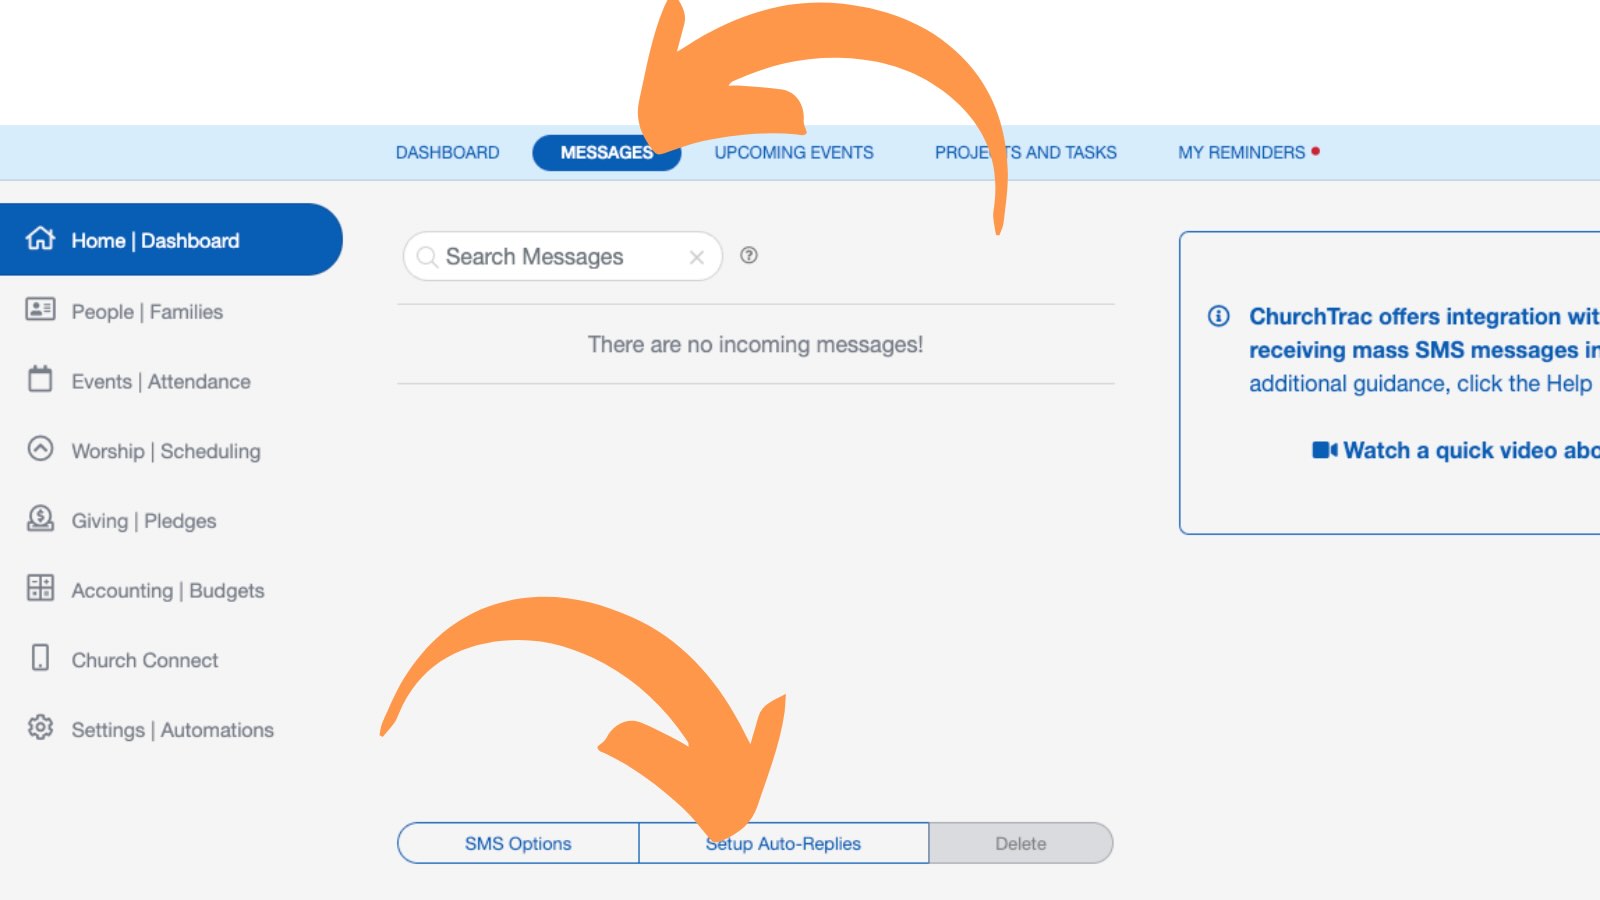
If you have a Twilio account integrated with your ChurchTrac account, you can create auto-replies that will automatically be sent to someone when they text your church a keyword of your choosing!
To create an auto-reply, go to the "Messages" tab in the Home and Dashboard screen. Then select the "Setup Auto-Replies" button at the bottom of the screen.
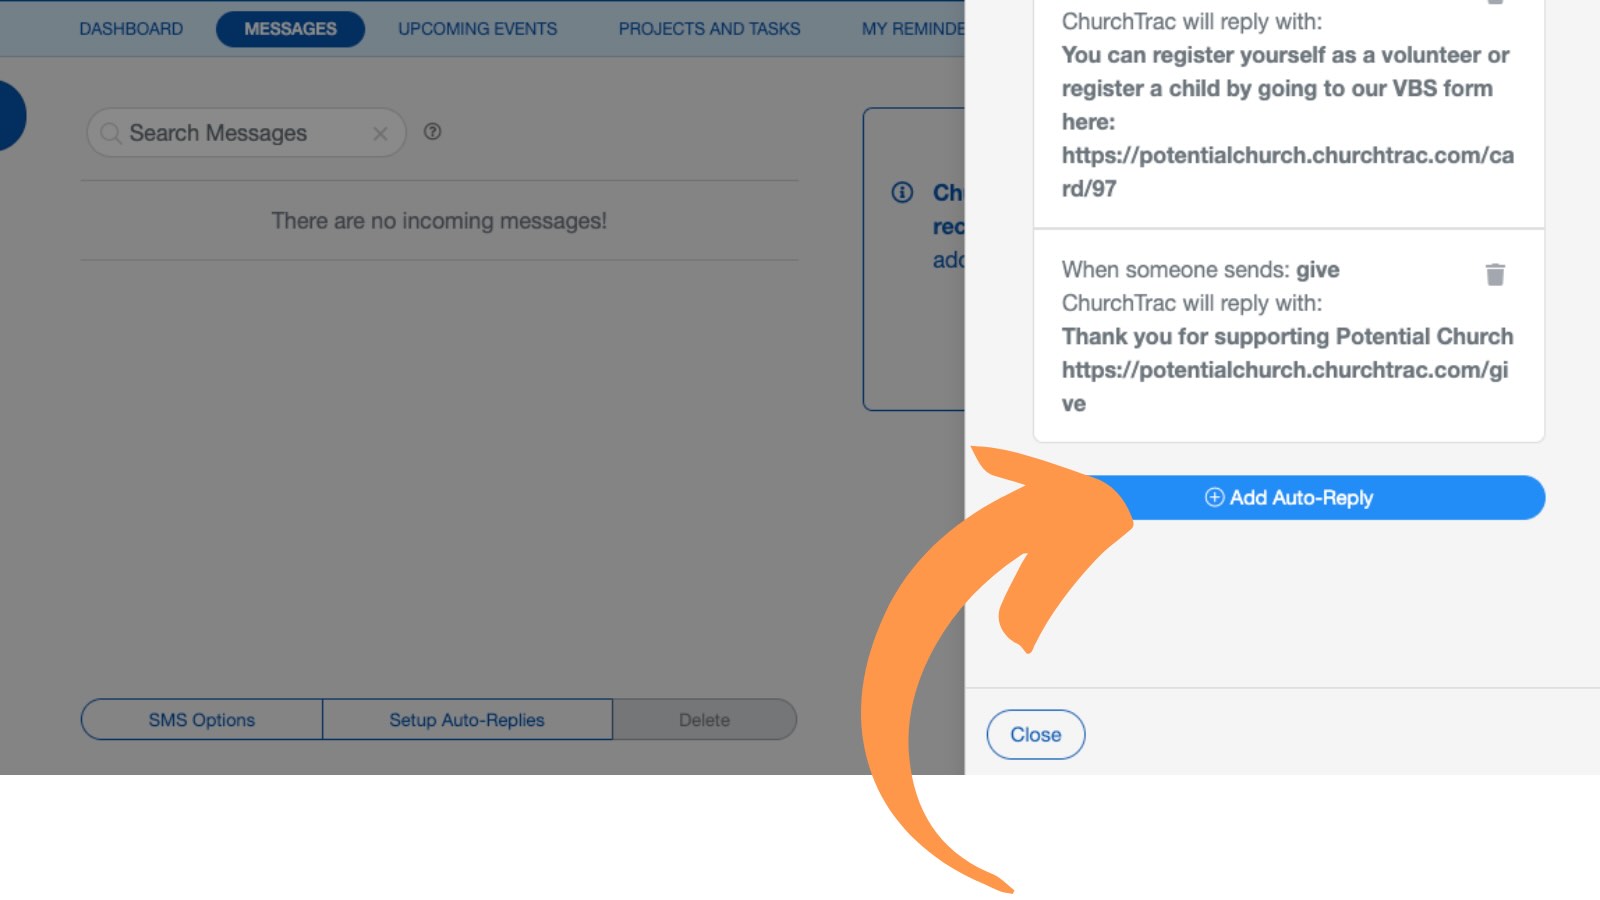
In the slideout menu, scroll to the bottom and select "Add Auto-Reply."
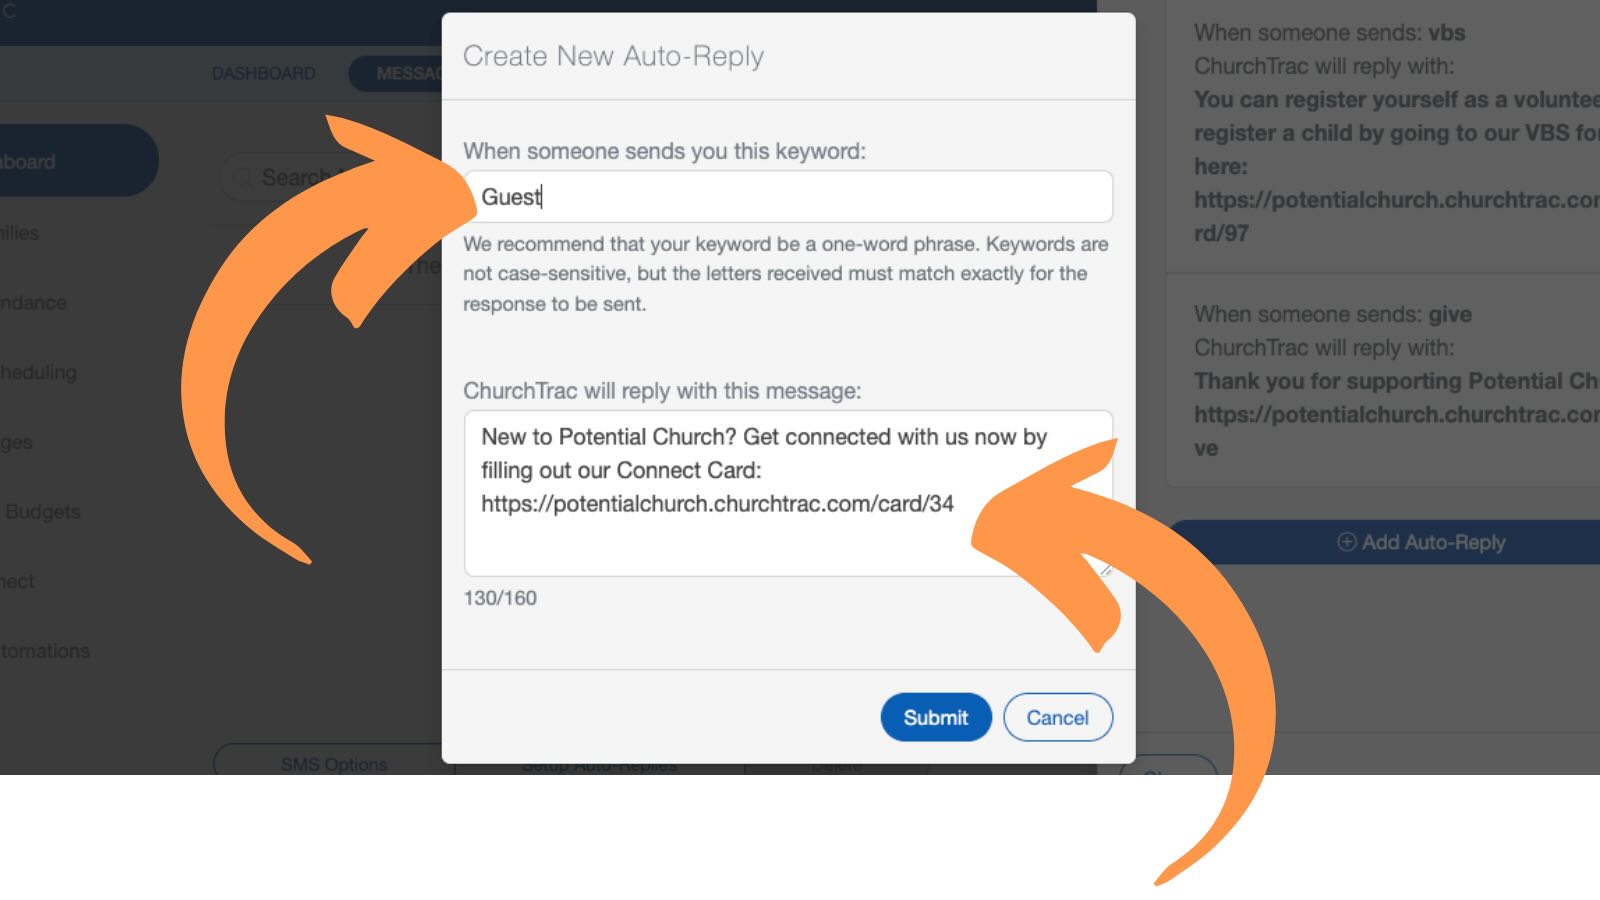
In the following window, enter the keyword you want to trigger the auto-reply and the message you want someone to receive when they text your church that keyword. Then select "Submit."
Example: Guest Follow Up
Enter "Guest" as the keyword and a message welcoming a newcomer to your church with a link to fill out your church's connection card. Now, whenever someone texts the word "guest" to your church's Twilio number, Twilio will send this message on your behalf. Learn More about Setting Up Auto-Replies ›
Automations Using SMS
Automations that send SMS messages require Twilio integration and do not work with the Built-in SMS feature. If you need to automate text messages, you'll need to set up a Twilio account and connect it to your ChurchTrac account. Once integrated, you can create automations that send SMS notifications based on triggers such as form submissions, attendance, or other events. Learn more about Automations ›
Twilio Troubleshooting
When sending/receiving messages with the Twilio Messaging Integration, here are a few solutions to common problems:
Insufficient Funds
If your account has insufficient funds, you will NOT be able to send or receive messages through the Twilio Messaging Integration. Navigate to the "Billing" option on the top right of your Twilio Console to resolve this.
Incorrect Account SID or Auth Token
In order to Validate your Twilio Account with ChurchTrac, the proper Account SID and Auth Token need to be pasted into your ChurchTrac "Voice and SMS Settings" configuration. Ensure that there are no added dashes, spaces, or additional characters when you paste your Twilio credentials.
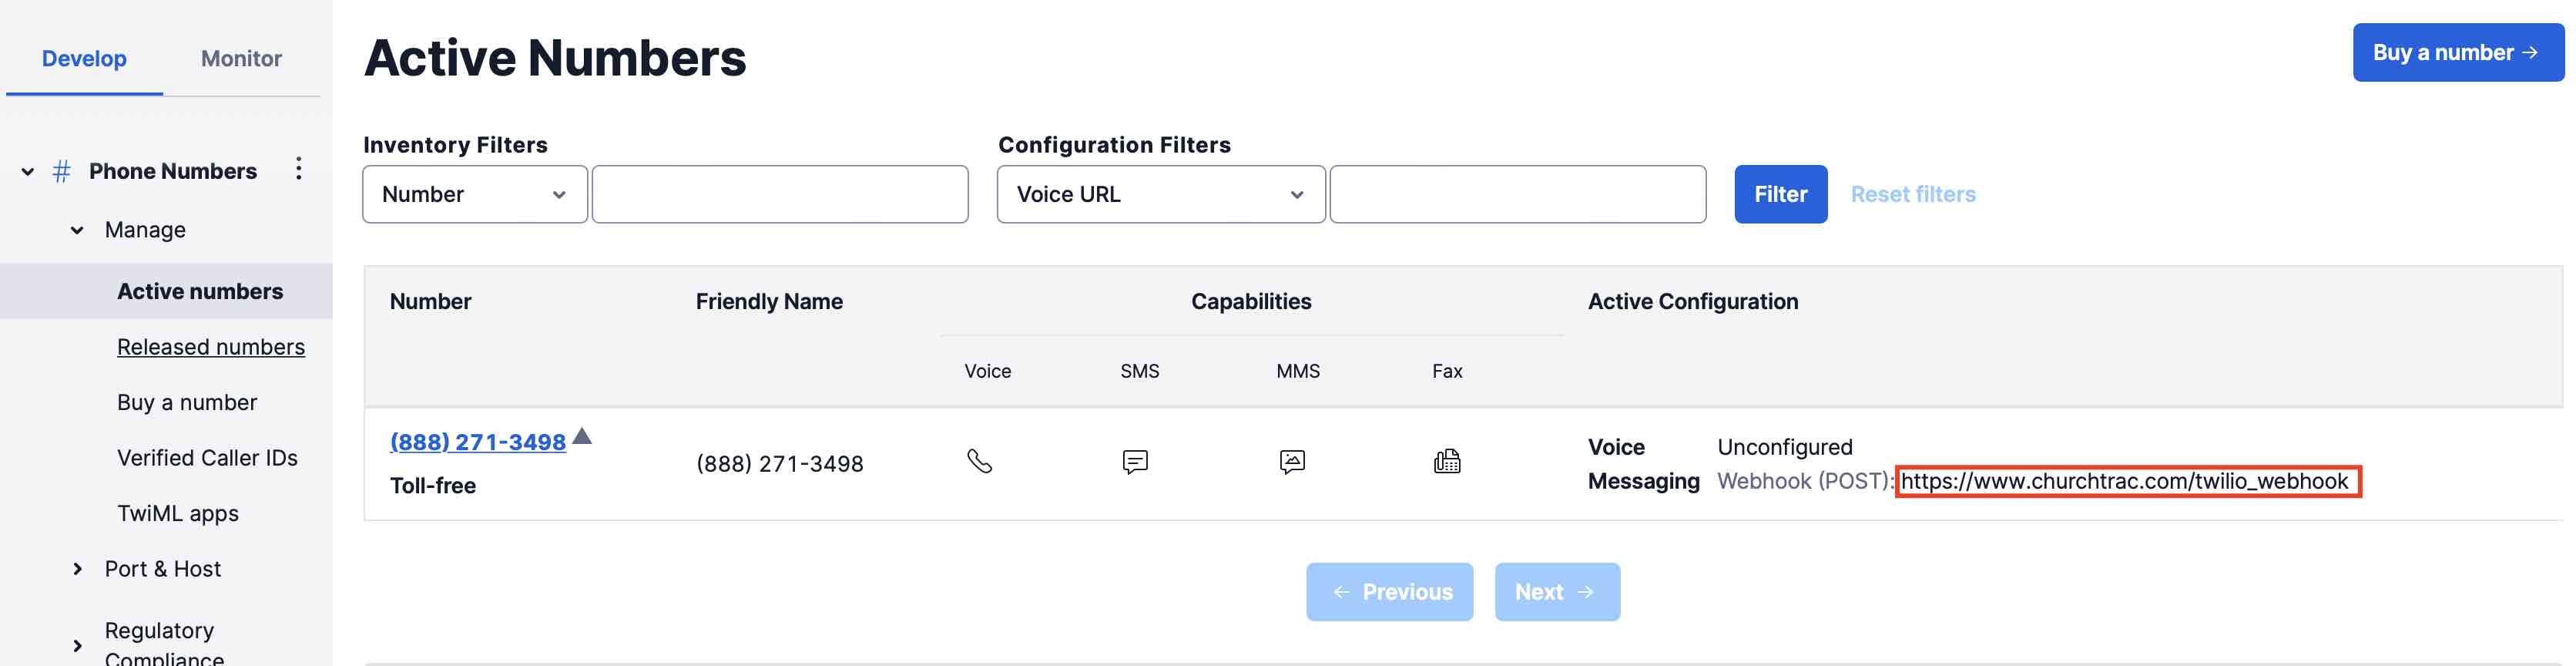
Missing or Incorrect Webhook
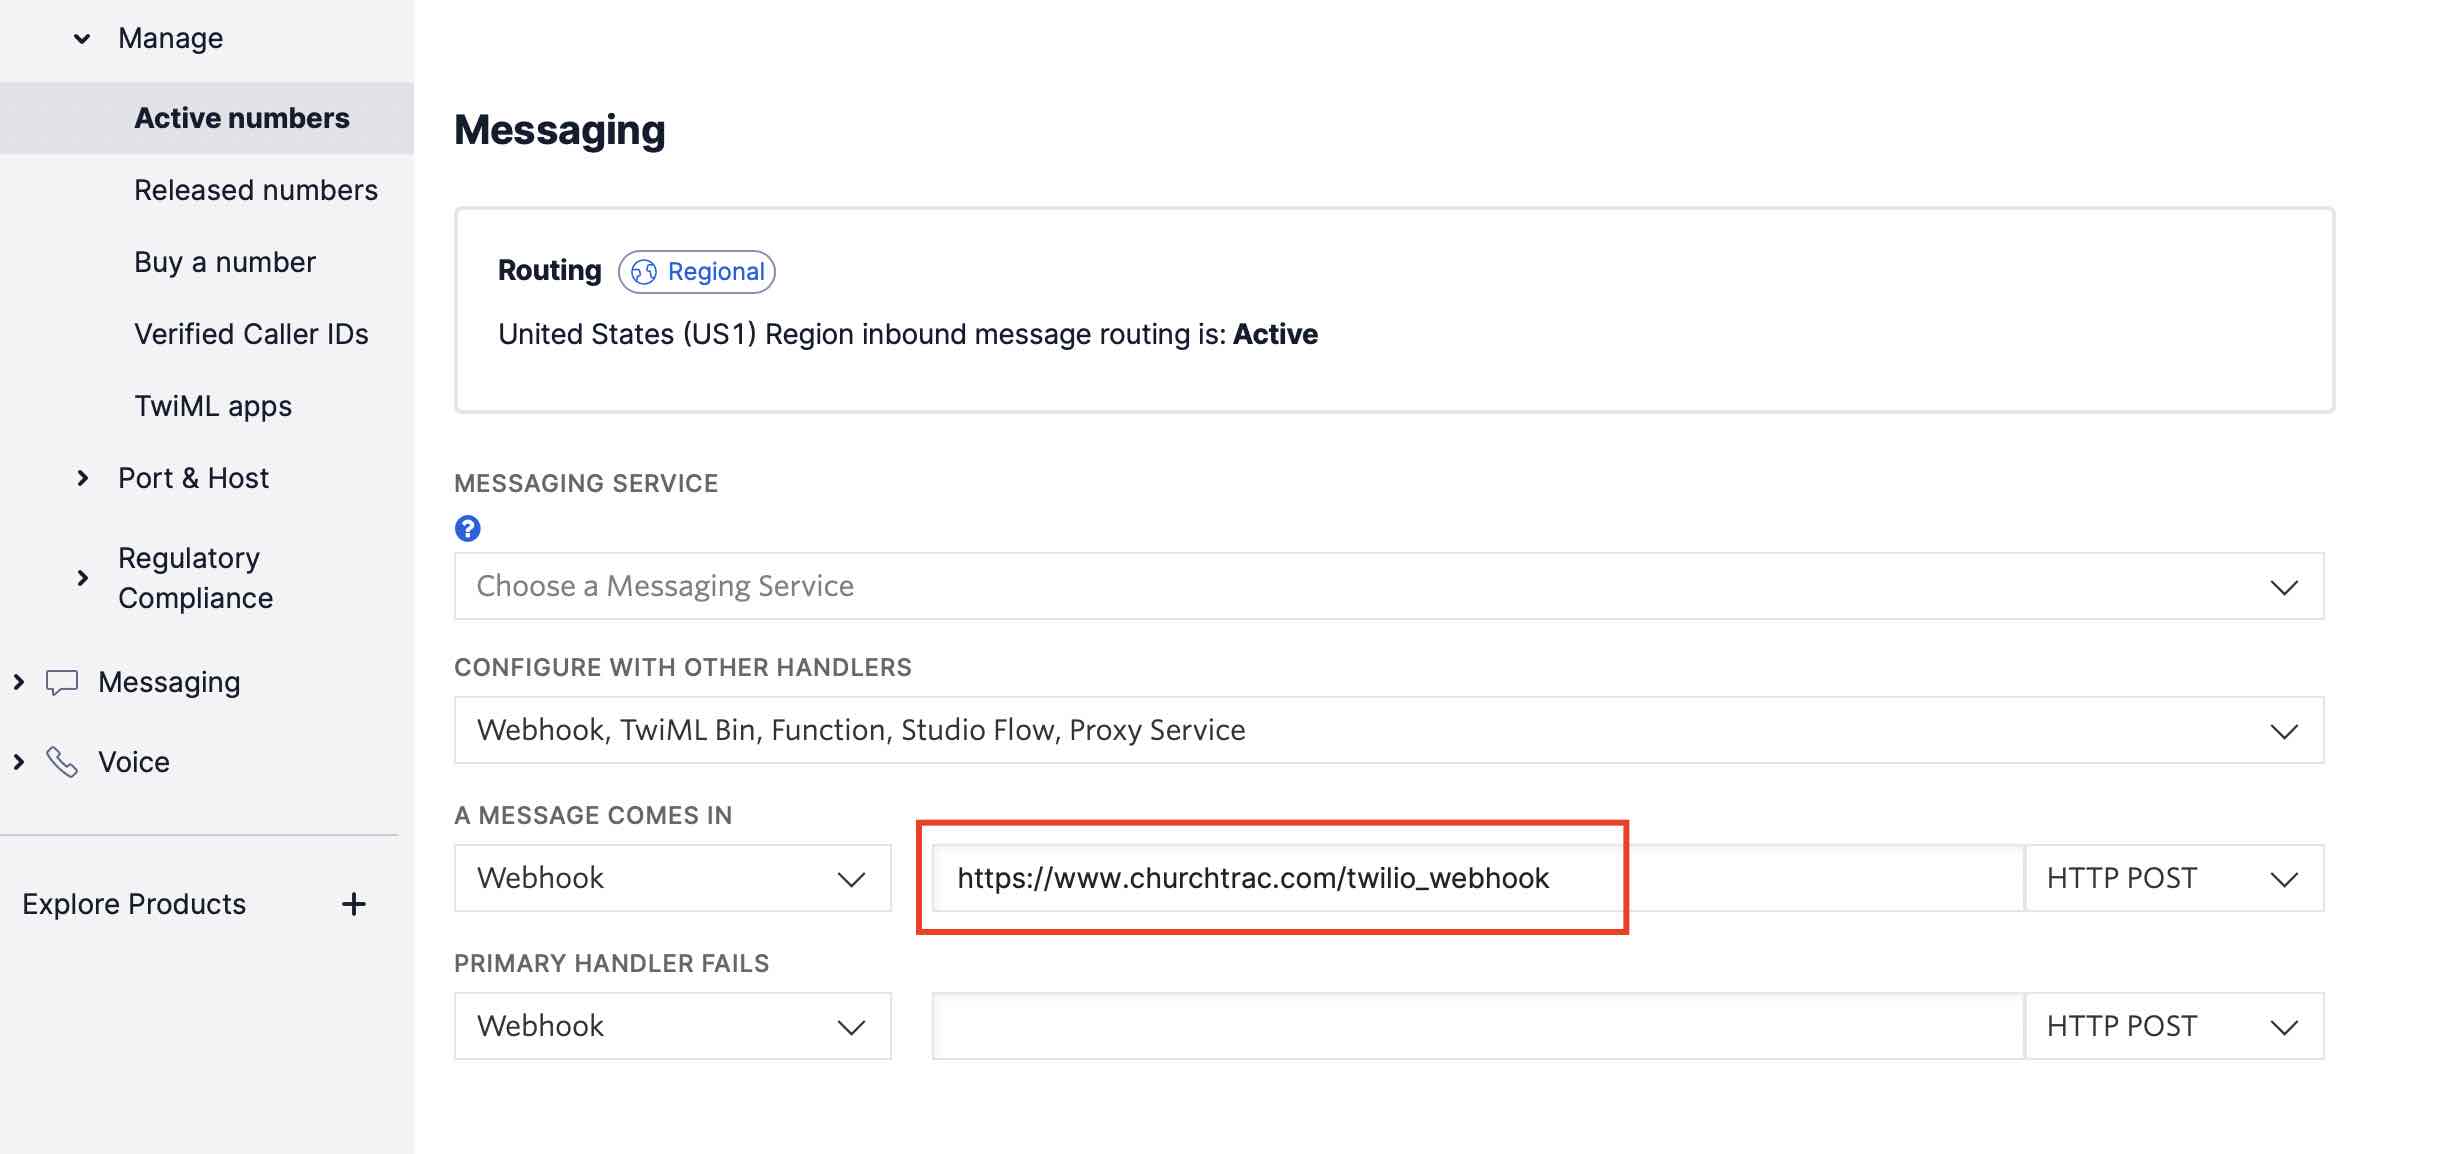
By default, ChurchTrac should automatically insert a messaging webhook into your number configuration. To check this in your Twilio Account, navigate to Phone Numbers Manage Active Numbers. Your messaging webhook should be displayed as "https://www.churchtrac.com/twilio_webhook"
If this webhook is not displayed, edit your webhook by selecting your number and updating the webhook settings under MESSAGING as shown below:
Basic Authentication for Media Access
When using voice messaging through the Twilio Messaging Integration, Twilio’s Basic Authentication requirement for media access may be "Enabled" by default. If this setting remains enabled, recipients could receive an error message when attempting to play your voice recording.
To prevent this, disable the Basic Authentication requirement before sending any voice memos. In your Twilio Console, open the configuration settings for the phone number you are using and locate the “ Basic Authentication for Media Access” option under the Voice settings. Turn this setting OFF (Disabled) to ensure media files (such as recorded voice messages) are accessible to your recipients without error.
